I caught another new (old) bug. Or is it re-caught? You know how it is. I started
watching a TV series based in the 1700’s, where muzzleloading rifles and pistols are
prominently featured. That reminded me of the fun I had back in the 1990s when I
used to own a muzzleloading rifle.
That muzzleloader was a Thompson/Center Grey Hawk. It was a traditional-style
percussion cap sidelock in .54 caliber. While traditional in format, it was not
traditional in materials. All the metal was silver-finish stainless steel, and the
stock was black plastic.
I took it hunting one year, in the HAM (handgun, archery, and muzzleloader) javelina
season. One day, we finally found the piggies, about 100 yards away across a barb
wire fence. I wore a belt over my hips that held my “possibles” pouch, containing
all the gear that you need to reload a muzzleloader in the field, along with a Ruger
Blackhawk revolver in a holster.
To shimmy under the wire, I removed the gun belt, and made the fateful decision to
leave it, and my daypack behind at the fence to make my final stalk. After all,
what javelina could possibly survive an encounter with a .54 caliber lead ball? A
cottontail that met one of those balls earlier in the hunt was pretty much totally
destroyed.
But I missed. So there I was, standing there holding an empty pipe, while the herd
ran every which way, including right past me! What a helpless feeling that was.
Eventually, I traded that rifle away and had not looked back at muzzleloading firearms
since. In the meantime, muzzleloading technology had advanced in leaps and bounds.
Traditional sidelocks, whether flintlocks or percussion caplocks, had become a very
small percentage of the overall muzzleloading market. Most muzzleloading rifles these
days are inlines, typically sparked by #209 shotshell primers, and fueled by pelletized
black powder substitutes, not loose black powder. Actually, makers of muzzleloaders
today offer a dizzying array of options, in guns, in fuel, in projectiles, and in
ignition. Today’s modern muzzleloaders are capable of outstanding accuracy and reach
that approaches the capabilities of smokeless cartridge firing rifles.
But my fresh interest wasn’t triggered by a desire to hunt with a modern muzzleloader.
While it may be nice to get revenge on the piggies for my earlier failure, it was seeing
all those 18th century flintlocks on the TV series, the English Brown Bess, and the
American Kentucky rifles, that piqued my interest. Since I wanted traditional, but
had no desire to fuss around with a flintlock, I decided to go back to what I knew –
a Thompson/Center percussion cap sidelock.
Of course, T/C is presently making no firearms, let alone traditional sidelock
muzzleloaders, which were discontinued in 2007. After the company was purchased by
S&W, a decision was made to halt all production in 2021.
But there is recent good news. T/C’s tooling, inventory, and intellectual property
was sold this year to Gregg Ritz, the former CEO of the company. Gregg is in the
process of restarting the company, starting with the Encore product line. He does
plan to make traditional sidelock muzzleloaders again, but that is at least two years
out.
T/C was instrumental in getting the sport of muzzleloading kicked off in the modern
era. In 1970, T/C introduced their Hawken rifle. Then, in 1972, the movie “Jeremiah
Johnson” came out, featuring Robert Redford as a mountain man in the early 1800s.
This was quite fortuitous for T/C, as Hawken rifles starred in the movie. T/C
successfully lobbied many state game departments for the creation of special
muzzleloader hunting seasons.

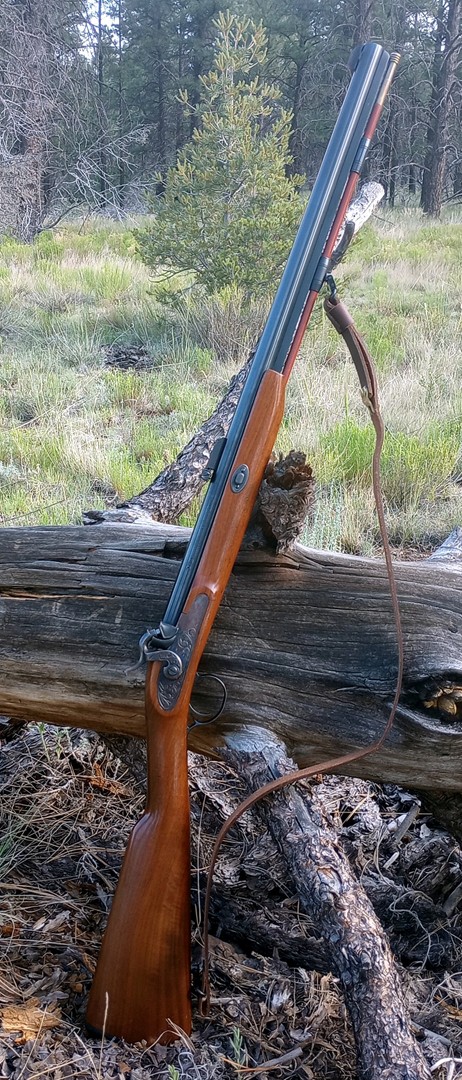
Late 1980’s Thompson/Center New Englander
I had no trouble whatsoever, finding numerous examples of used T/C muzzleloaders on
Gunbroker.com. Of course the best part about buying a muzzleloader on Gunbroker
is that there is no need to put an FFL into the middle of the transaction. A
muzzleloading black powder firearm is not a regulated legally-defined “firearm” subject
to background checks and all that rigamarole. Bid, win, pay, and the rifle is sent
directly to your home.
I found one that looked good to me, a “New Englander” model in .50 caliber. It was
listed for $399, but with the “Take a Shot” option. That meant that I could make an
offer. I “took a shot” at $360, and the offer was immediately accepted. It was so
quick, that it may have been an automatic setting when it was listed.
A lot of sellers on Gunbroker charge you a credit card fee of around 3%, including
this one. On top of that was Arizona state tax. And on top of that was a fixed $40
charge for shipping. All said and done, the purchase cost me just under $450,
delivered.
The New Englander was one of T/C’s most basic traditional muzzleloading rifles.
Nothing fancy, no double-set triggers, no octagonal barrel, no brass patch box. I
guess that its simple functional purity is what appealed to me.
In fact, it is just the walnut and blued metal version of my old Grey Hawk. There was
even a version of the New Englander that used the same plastic stock as the Grey Hawk.
The Grey Hawk had a 24” barrel, where the New Englander has a 26” barrel, both 1-in-48”
twist.
But I knew that buying the gun was only the start of what I would need before I could
take my first shot with the rifle. As I waited for the gun to arrive, I went down to
Sportsman’s Warehouse to purchase as much of the needed accessories as I could. But
they didn’t have everything.
Most critically, they had no #11 percussion caps. I came to learn that percussion
caps have been tough to find in the last 3 years or so. I had no idea. I guess since
modern inline muzzleloaders had taken over the market, most of which use shotshell
primers, the demand, and hence production of percussion caps had plummeted.
What to do? Research led me to a company that makes dies to punch out caps from aluminum soda cans. They
also sell the chemicals to make the priming material.
Another company offers a replacement for the percussion cap nipple that allows you
to use #209 shotshell primers. This solution comes in two parts: First the
replacement nipple that accepts the primer. On to that, another piece screws on
that contains the firing pin that hits the primer when the hammer drops. I ordered
one of these setups.
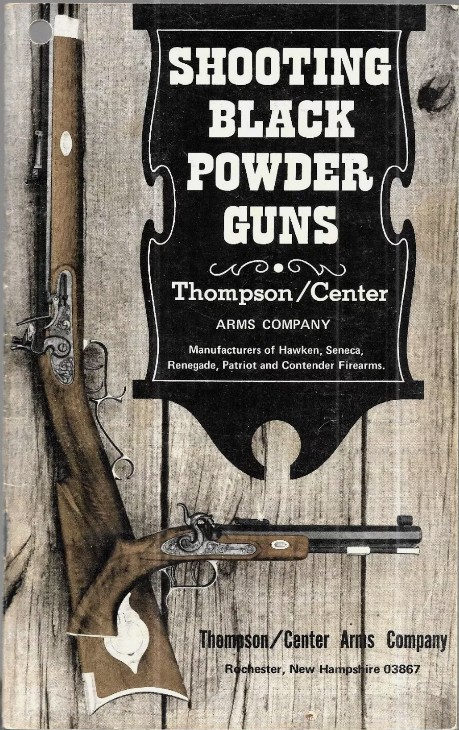
Since it had been nearly 30 years since my last one, I figured that I needed to get
the original T/C manual, just to make sure that I was reminded about anything that I
might have forgotten. These are available on eBay, in several editions.
An order to Midway USA got me a box of 100 .490 caliber lead balls and 3 boxes of Hornady
Great Plains pre-lubed conical bullets, 20 bullets per box.
Then I needed a box to store all this stuff. MTM makes such a
muzzleloader-specific
box.
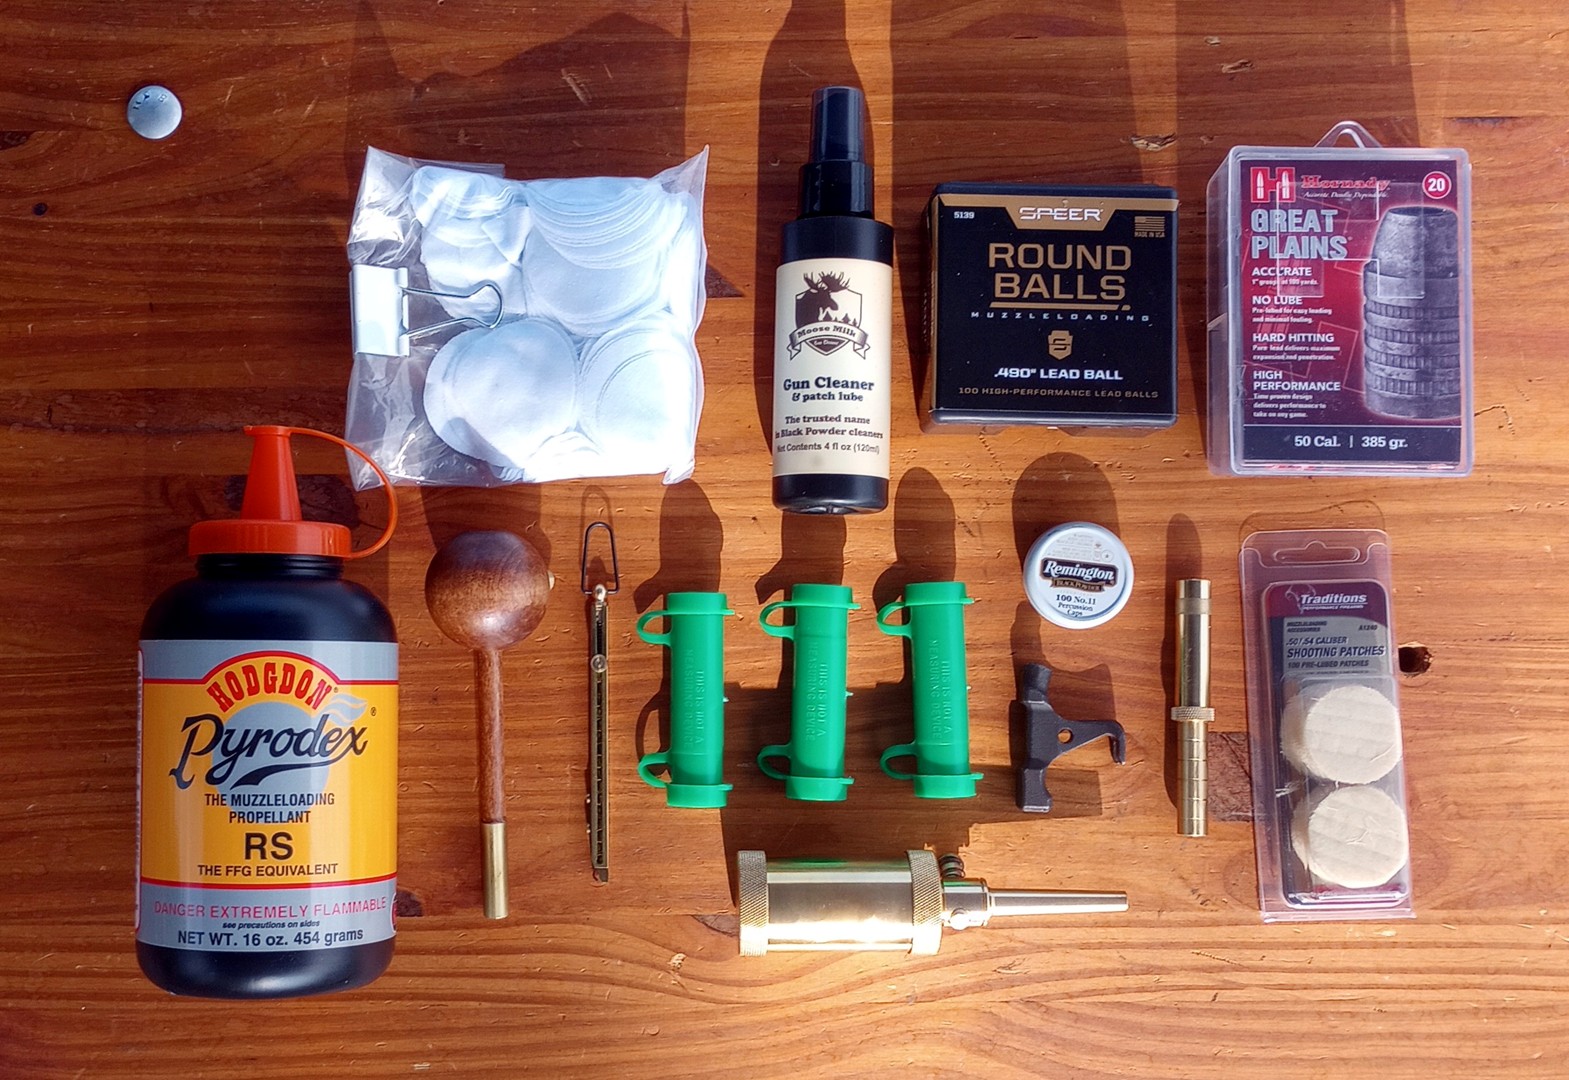
Pictured here are a number of the accessories that you might need to shoot or hunt with
a traditional muzzleloader:
Let’s start with the upper left, moving right, then down to the second row. First are
cleaning patches. When target shooting, I found myself swabbing the bore with a wet
patch, then a dry patch after each shot. Otherwise, getting a patched ball down the
bore gets tougher and tougher each time.
Next is a small spray bottle of “Moose Milk”, a popular black powder solvent. This is
what I used to dampen the wet swab patches between shots to keep the bore clean.
Finishing the top row is the box of .490” lead balls and one of the boxes of the Hornady
Great Plains bullets. Because you seat a lead ball on top of a lubed patch (shown below
the Great Plains bullets), the balls need to be slightly undersized from bore diameter.
The lubed patch takes up the difference and engages the rifling.
The Great Plains bullets have a slightly undersized and hollow base to allow starting a
bullet down the bore, but the upper driving band is full bore diameter to engage the
rifling. No patch is required, but savvy shooters often use a lubricated felt disc wad
under the bullet, over the powder, to protect the pure lead base from the hot gas. I
haven’t tried that yet.
Proceeding to the bottom row, left, is a one pound canister of Pyrodex RS black powder
substitute. Back in my Grey Hawk days, I also only ever used Pyrodex. The RS stands
for rifle and shotgun. This is equivalent to the FFg (“2F”) grade of black powder.
These days, there are several additional new BP substitutes out there, but they may not
ignite well with percussion caps. They may need the hotter spark of #209 primers.
Again, I was going with what I already knew and was comfortable with.
To the right of the powder is an original T/C short starter. This was another eBay find,
new, unused in original packaging. You can see how it is used to start a patched ball
down the bore in the sequence of pictures below.
To the right of the ball starter is a capper. Those percussion caps are tiny little
things, difficult to handle. The capper is basically a magazine for percussion caps
that make it easier to place a cap onto the nipple. I’m not happy with this particular
one. It doesn’t hold the cap at the end very tightly and they tend to fall off, which
negates the entire point of it. I’ll be looking for something better.
The green tubular things are muzzleloading speed loaders. The cap at one end is labeled
“powder” and the cap at the other end is labeled “ball”. You place a patched ball (or
conical bullet) into the end labeled “ball” as if you were starting the projectile down
the muzzle. Close the cap. Then in the end labeled powder, you drop your measured powder
charge. Then cap that end.
These make it faster to reload your rifle in the field. Open the powder end and pour
the powder down the muzzle. Open the ball-end cap, hold the speed loader over the muzzle
and push the ball down through the speed loader into the muzzle using your ball starter.
Use your ram rod as normal to get the ball or bullet all the way down to the breech end
of the barrel.
Pictured below the speed loaders is a field flask for powder. The mountain men used a
powder horn, but a hunter today doesn’t need to carry that much powder in the field.
This brass flask only holds enough powder for maybe 10 shots. That’s more than enough,
especially if you are carrying speed loaders with pre-measured charges.
In the round white tin below the lead balls, to the right of the speed loaders, are #11
percussion caps. Yes, I found some, but not in any store, nor online. At a recent club
shoot I mentioned to Wade that I was getting back into muzzleloading, but that I couldn’t
find percussion caps anywhere. It turned out that he had a stock of them. I happened to
have a pistol scope that he could use, so we struck a deal that resulted in the pistol
scope going to him, and some dollars and some percussion caps coming to me.
Below the tin of caps is a 3-in-1 combination tool. One end is a small hammer that
allows the barrel wedge to be started out. Another end has a claw-fork to pull the
barrel wedge all the way out. The barrel wedge is what holds the barrel into the stock.
Removing the barrel from the stock is important for a thorough cleaning, which I will
explain shortly. The third end of the combo tool is a nipple wrench to allow the removal
of the nipple from the barrel.
Next is an adjustable brass powder measure. You may know that black powder and its
substitutes are measured volumetrically, not actually by weight. This powder measure
adjusts to measure from 30 grains to 120 grains in 10 grain increments. A typical
charge for this rifle is from 70 grains to maybe 100 grains.
Finally, there are the pre-lubed patches used for shooting lead balls, already mentioned.
By the way, a .50 caliber lead ball weighs about 177 grains. The Hornady Great Plains
bullets weigh 385 grains, more than twice what the lead balls weigh.

Loading procedure: 1. Measure powder, drop down bore. 2. Place ball over pre-lubed patch
over the muzzle.
3. Using the stubby nub of the short starter, seat patched ball down
bore. 4. Using longer side of the short starter, push ball down about 4 or 5 inches.
5. (not shown) Push the ball all the way down using ram rod, seating firmly on top of
powder. 6. Place cap on nipple.
Right now I don’t have any kind of a pouch for carrying supplies in the field for
hunting. I plan on making myself some kind of a leather pouch, but probably not a
purse style one that hangs over the shoulder as one pictures the mountain men of old
using. I’m leaning toward a belt pouch, though I might add some D-rings to give me
the option of attaching a shoulder strap if I later decide that’s what I want to do.
When the rifle finally arrived at my doorstep, it came through the U.S. Postal
Service by the way, I found that it was in great shape - looked practically new.
Then I ran some cleaning patches down the bore. They came out blackened. Uh oh.
Somebody shot the gun then neglected to clean it before putting it away – a cardinal
sin when it comes to black powder firearms. How long ago was that? Also, the rifle
came from a moister place than the desert southwest – Georgia.
It didn’t take too many more solvent soaked patches before they started coming out
clean, but then I shined a strong flashlight down the bore and saw ugliness. Not
good.
I hold out hope though. I have some old military surplus rifles with rough bores
that still shoot acceptably. Such are the risks when you decide to buy an
approximately 35 year old black powder gun I suppose. I had hoped that since the
outside looked well taken care of, that the inside would have been as well.
The first chance I had to shoot the New Englander was at the July 20th Combo
Silhouette Match. I brought it out to show it off and of course to get first shots
down range.
I took the first shot, then three other club members gave it a try. We shot patched
round balls at the big pigs at 100 meters. None of us hit a piggy. It seemed that
the sights were set to hit too high, and a bit rightward.
About a week later I decided to go up to the high country to put the rifle on paper
to sight it in and to check grouping. I took my camper and stayed for a couple of
nights. I spent most of a day shooting this rifle and getting re-acquainted with
shooting a muzzleloader.
The first thing I tried to do was get velocities. I set up the LabRadar, but was
not getting good results. Was the big cloud of smoke interfering with the radar
signal? I only tried a few shots before giving up. I might give it another try
the next time.
I shot patched round balls (PRB) for most of the day, chasing zero on the rear sight.
For PRB, I ended up cranking the sight all the way down. In the end, it was a bit
frustrating, as grouping sucked. Just when I thought I had it zeroed, I would get a
flyer way off to the side, or the next several shots moved way over.
I was shooting at a round black bullseye target, 8 inches in diameter, at ranges
between 65 and 85 yards. My modest goal was to get them centered in the black and
keep them there, but that wasn’t happening.
I tested with various charge levels from 70 grains to 90 grains, even testing the 5
grain increments between the notches on the powder measure. None of that seemed to
make a difference. I also experimented with different sight holds. The sight
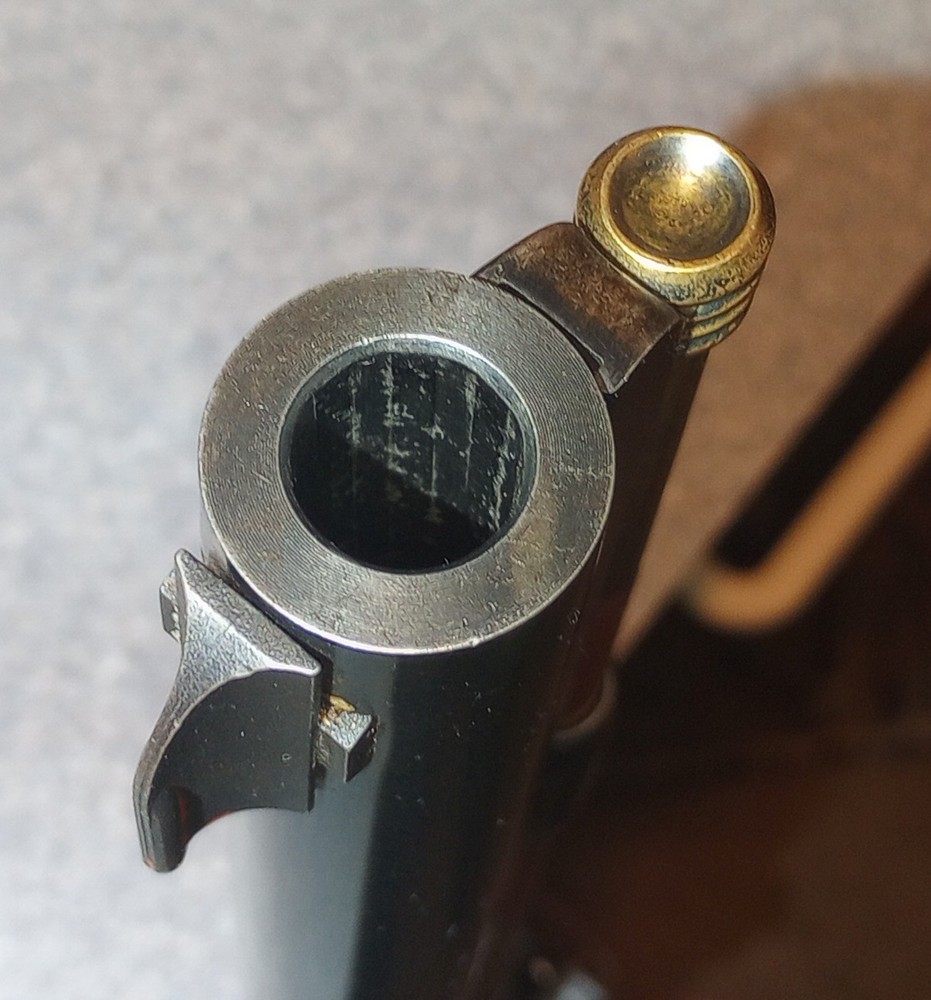
picture looks like this:
The rear sight appears as a shallow valley, with the front sight appearing as a ball
on a stick. It seems that centering the ball in the valley left-right, should give
you a fairly consistent windage hold, yet I was getting a lot of off-to-the-side
flyers.
My first inclination was to bury the ball into the valley so that no stick is visible,
however I later decided that some stick showing was better because you can then more
precisely see that the front sight is centered in the valley for windage. But then
that means that you don’t have a real positive reference for how high the ball should
float above the valley for elevation hold.
Then I played around with the front sight ball covering the target bull, or should it
form a figure-8 with the target bull? Halfway covering the target bull? If I could
keep them all in the black, at least at 50 yards, that would mean that I could give
javelina hunting with a muzzleloader another try, but so far, no luck with that.
I finished the day shooting 10 of the Hornady Great Plains conical bullets. I did
seem to achieve greater consistency with these bullets than with PRB. These shoot a
lot slower than the PRB because they are twice as heavy. I had to bring the rear sight
up many clicks to get the holes into the black:
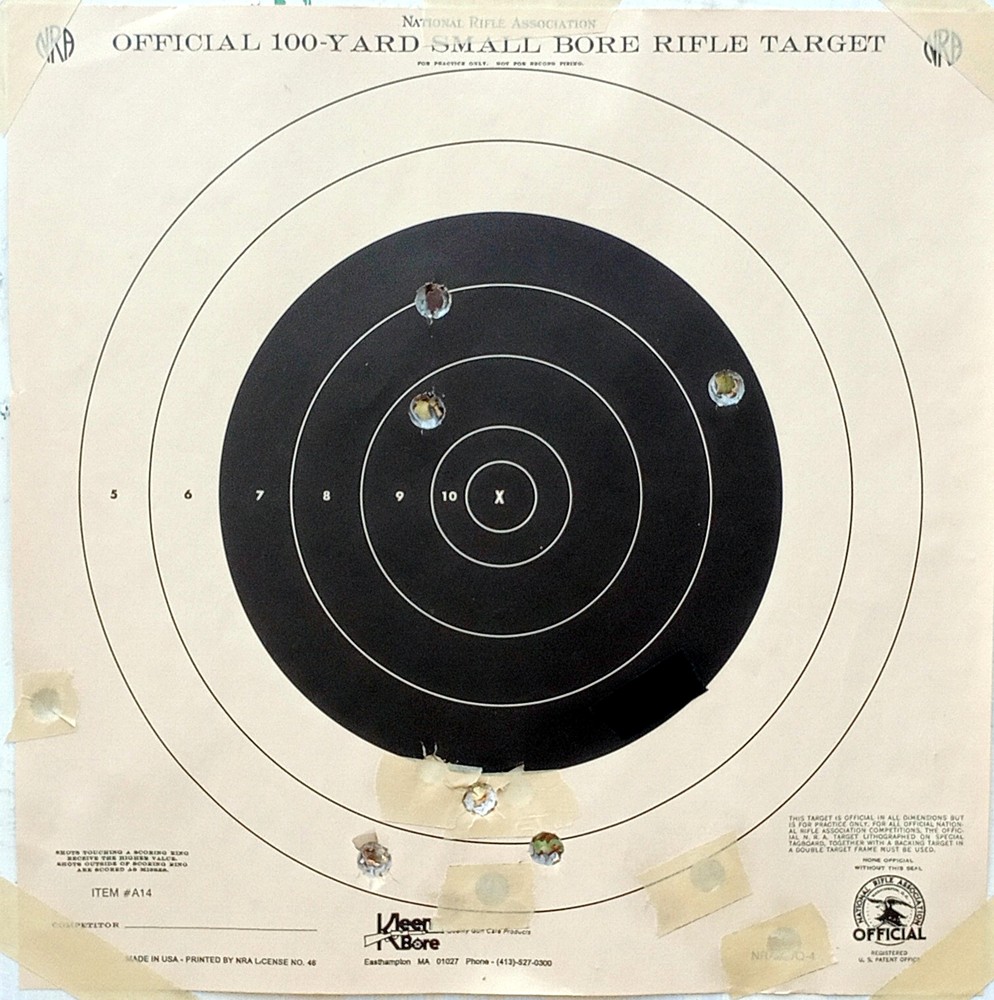
I wish I could tell you that those were two 3-shot groups with a sight adjustment
in-between, but it wouldn’t be true. At least the windage showed good consistency
among my final six shots of the day.
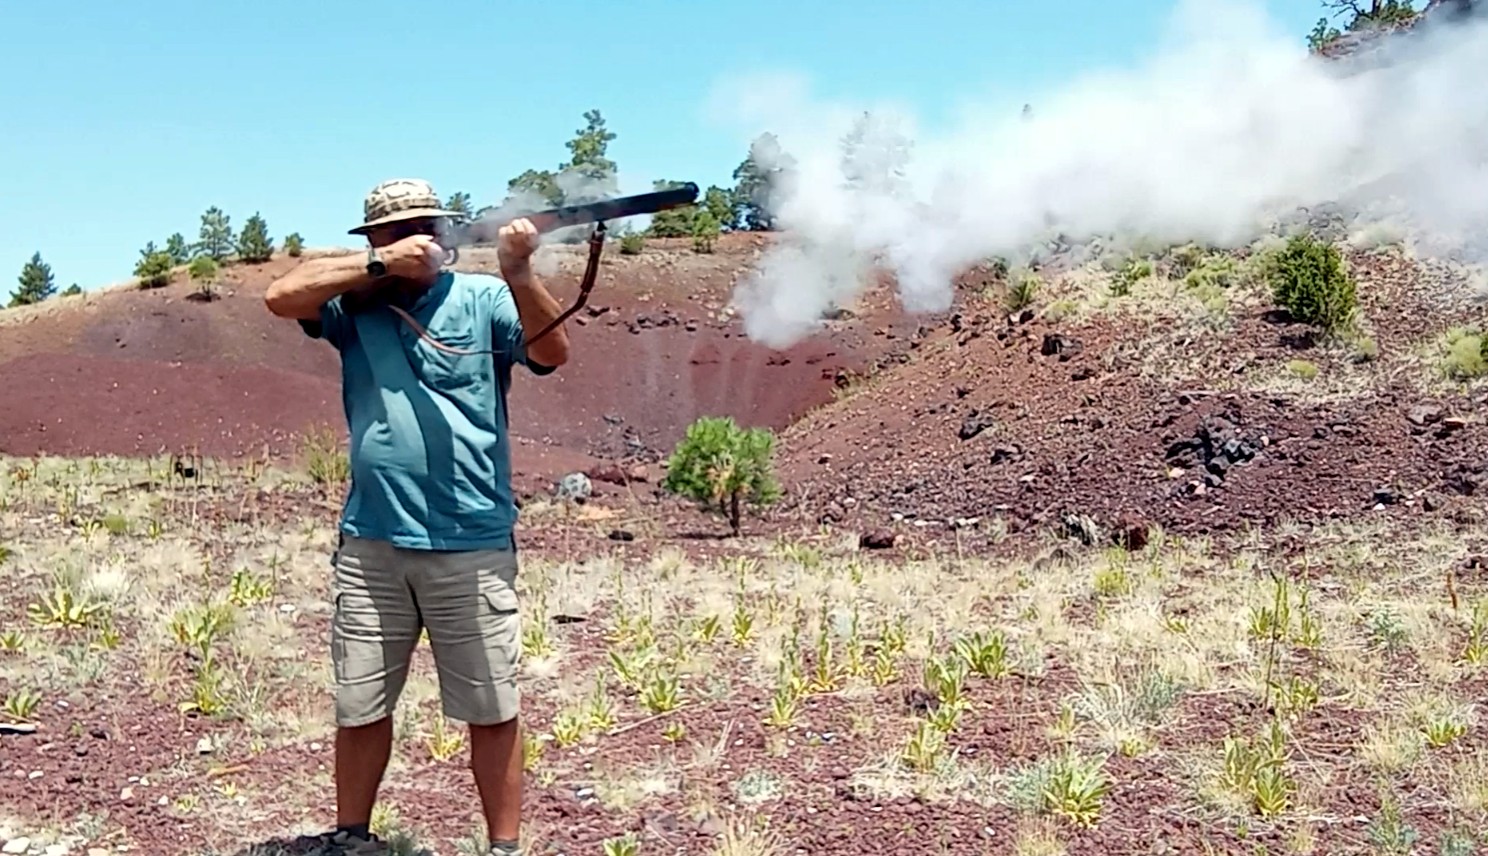
I had taken about 50 shots over the course of the day, and though I had been swabbing
the bore between shots, the crud was really starting to build up around the nipple and
the back of the barrel (see lock area smoke in the
first photo). I decided that it was time to quit and give the gun a good cleaning.
The time tested technique for cleaning a traditional muzzleloader is to remove the barrel
from the stock and soak the breech in a bucket of hot water, maybe with a little soap,
and to pump the hot water up and down the barrel, through the nipple and/or nipple hole
at the back of the barrel, using you ram rod, jag, and patches.
I like to loosen the nipple at first to pump the water through the nipple, and so that
some water leaks past the nipple threads to clean them. Then I remove the nipple so
that the water pumps through the barrel and breech with higher volume and velocity.
I found that a clean, unused, 1-gallon paint can from the hardware store is just about
ideal for this task, as it can be heated on a stove burner. The hot water does a good
job of heating the barrel, so that once you remove the barrel from the bucket, the water
evaporates quickly. But most importantly, the hot water dissolves the corrosive salts
deposited by burning black powder (or BP substitutes). After the barrel dries, you then
dress the bore and the outside of the barrel with moose milk, bore butter, Ballistol,
or other natural gun lube to leave a thin layer for rust prevention.
I’ll be the first to admit that I am a rank amateur at this muzzleloading stuff. I know
just enough to be able to make it go BOOM, most of the time. There are nuances and
subtleties involved in loading a traditional muzzleloader to achieve best accuracy.
There is much to learn.
For example, after getting home from my disappointing range session shooting PRB, I read
that round ball inaccuracy could be due to not centering the ball perfectly on a pre-cut
patch when loading. A cure? Start the ball in a pre-lubed strip of patch material
(“pillow ticking”) and cut off the excess with a knife flush at the muzzle before
seating the ball fully down the barrel. That way, the patch wraps symmetrically around
the ball every time.
Another thing I want to try is saboted .44 caliber pistol bullets. Saboted bullets are
something that I never tried back in my Grey Hawk days.
Inspired by a TV show, I got the rifle mainly as a fun and cool range toy. If I can
figure out how to get it to shoot accurately enough to hunt, well that would just be
gravy.