If you’ve got an old shotgun laying around that could use a facelift—or you’re getting
prepped for turkey season—this is an easy way to give your gun a custom camo look with
just some spray paint and stencils.
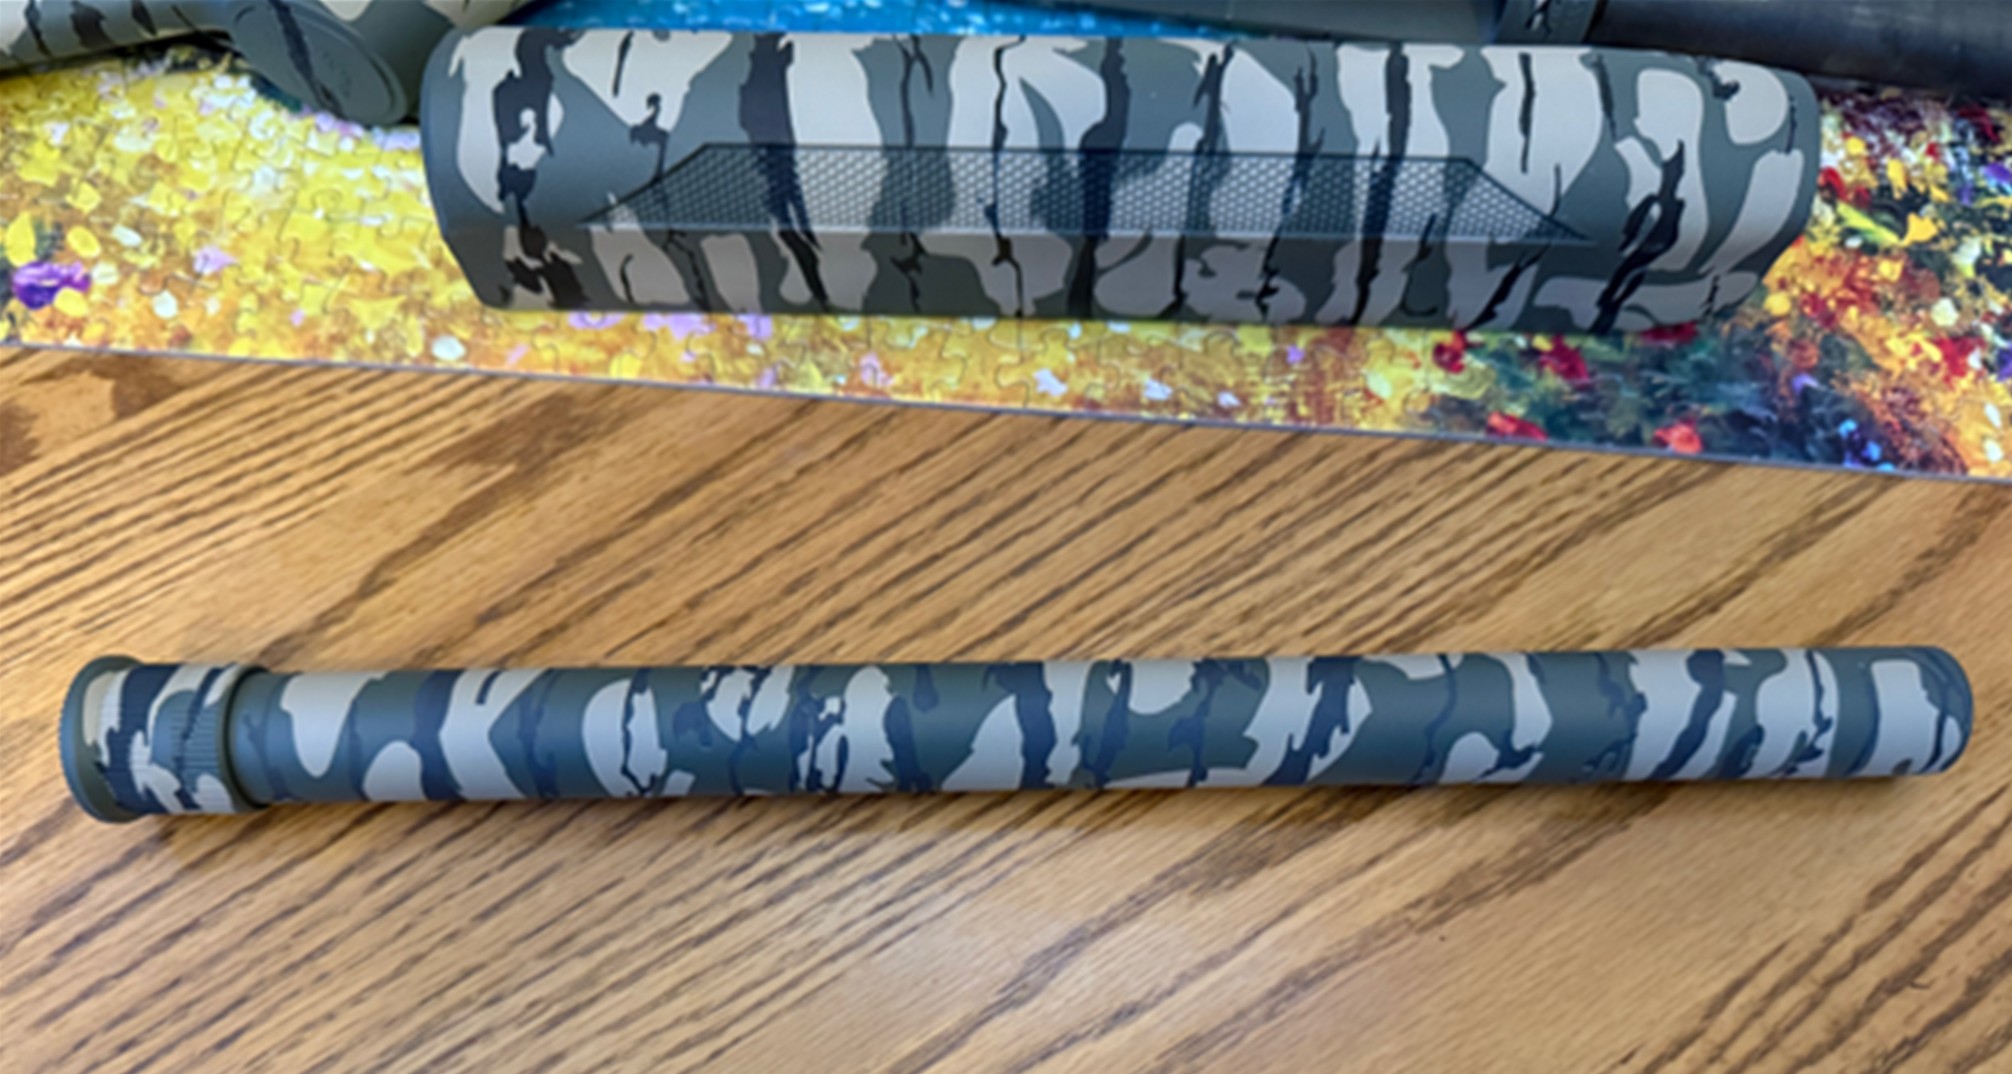
My shotgun started out black, so I was able to skip step one (painting it a base color),
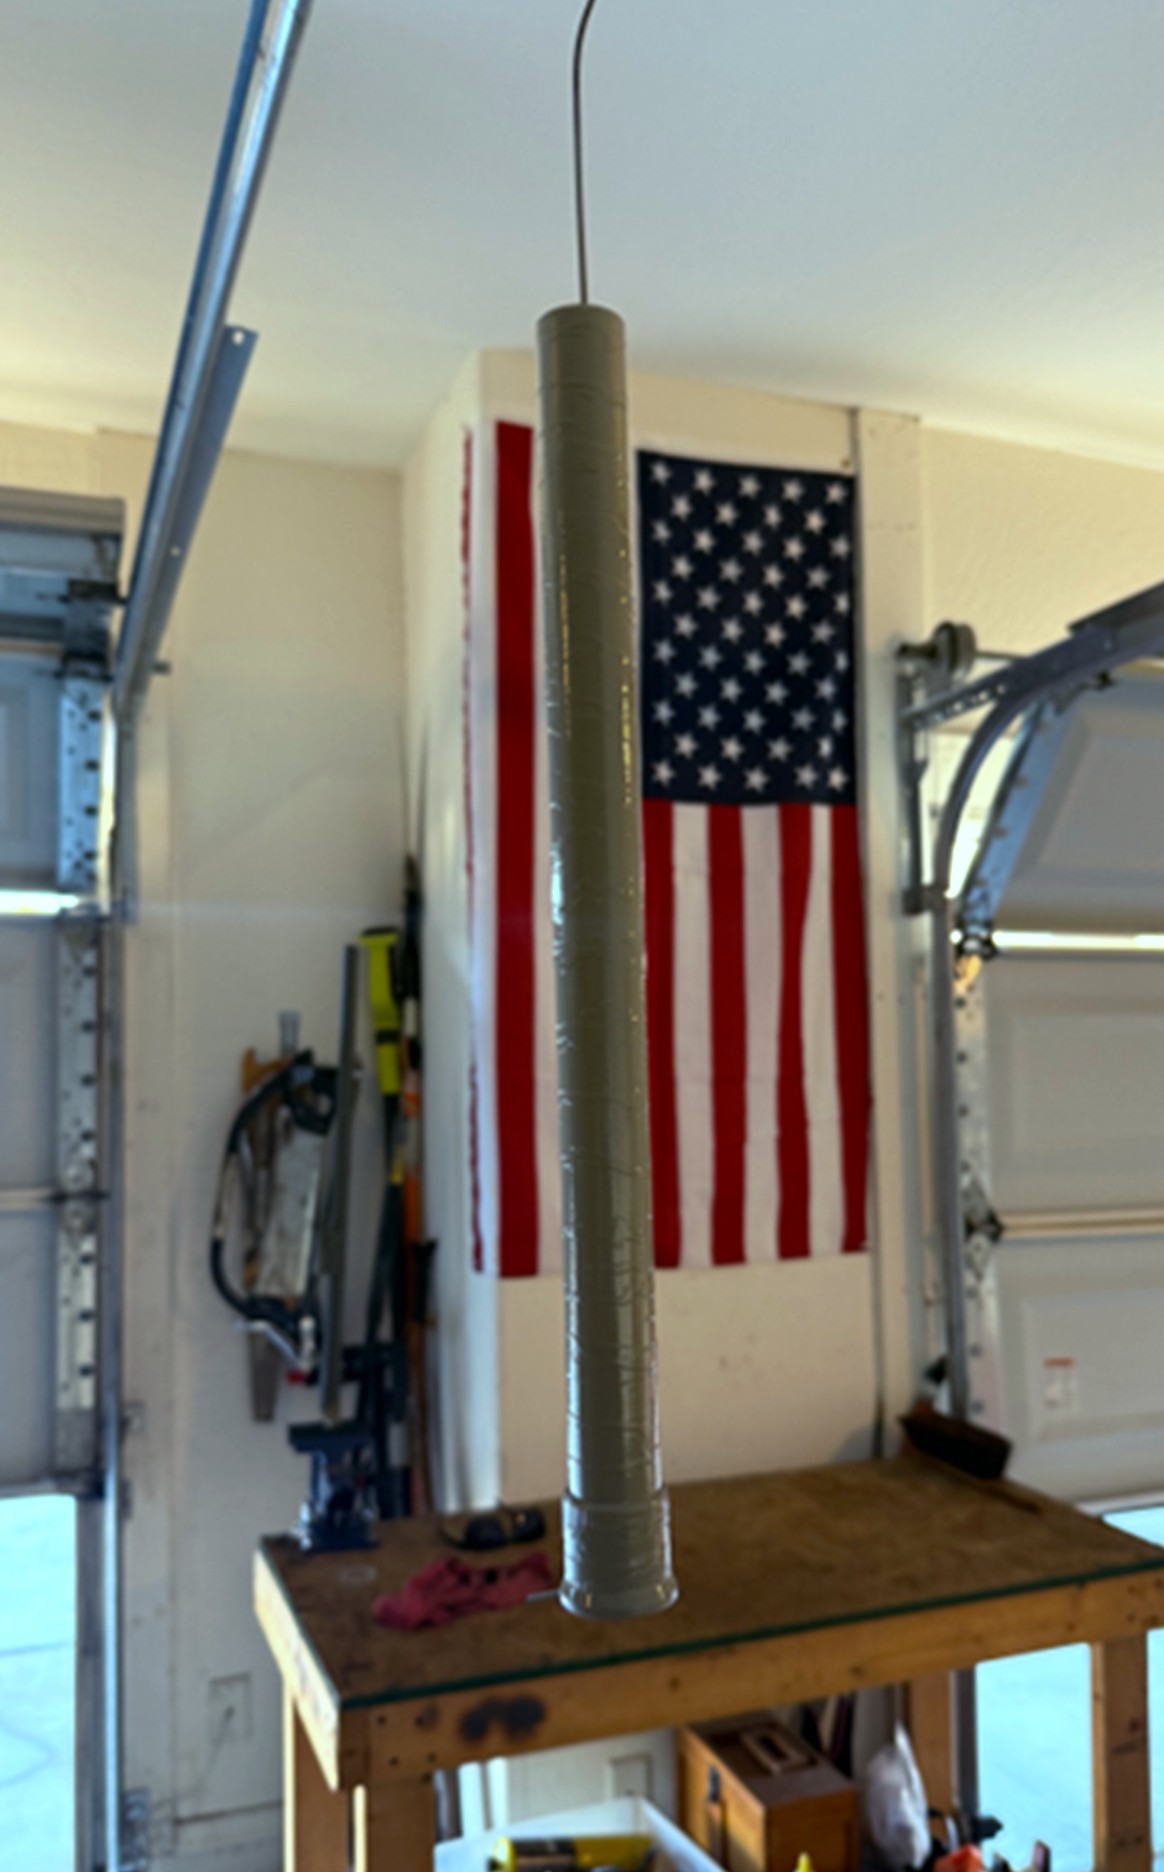
but I’ll walk you through the rest, especially how I did the extended mag tube since
that’s when I started snapping photos.
What You’ll Need:
• Spray paints (I used flat FDE and flat OD green)
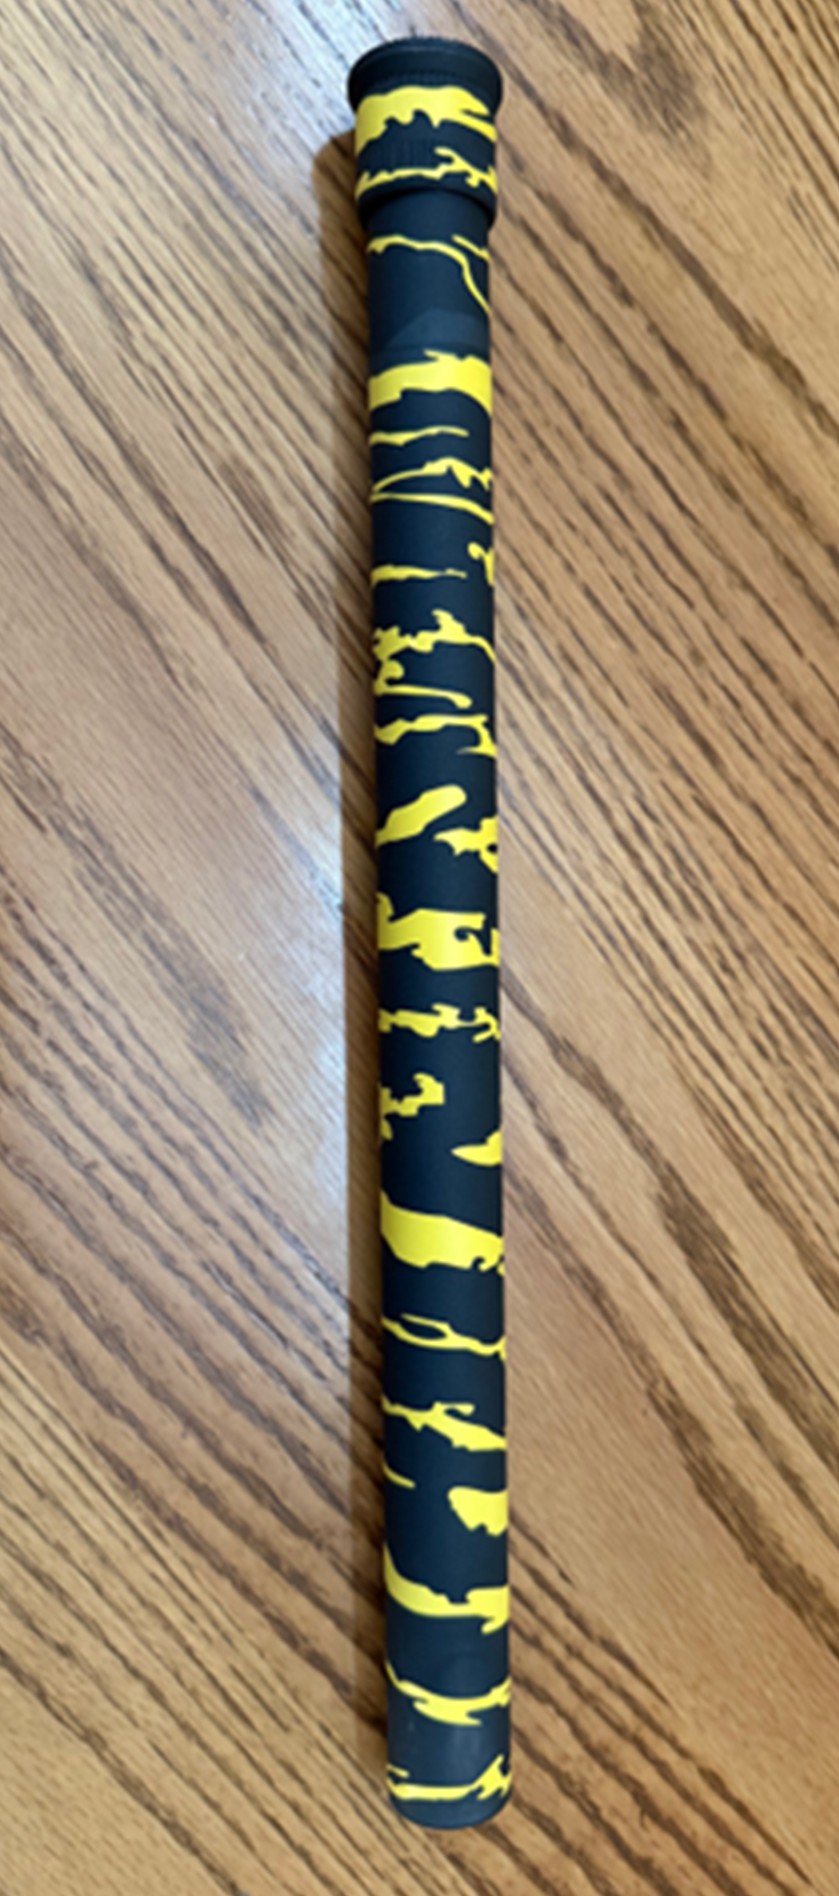
• Camo stencils (I used Bottomland—picked mine up on Etsy, but Amazon has them too)
• Painter’s tape (optional, for masking off certain parts)
• Time and patience
Step 1: (Optional) Spray Base Coat
If your gun isn’t already black, start by spraying it down with a flat black base coat. Let
it dry completely before moving on.
Step 2: Apply First Set of Stencils
Lay down your first set of camo stencils directly onto the gun part you’re painting. For
curves like the mag tube, take your time to make sure they stick down well. This layer will
remain black (or your base color) when the paint job is complete.
Step 3: Spray First Colors
I used Flat FDE (Flat Dark Earth) for my first color. Spray a light, even coat over the entire
area. Let it dry thoroughly before moving on.
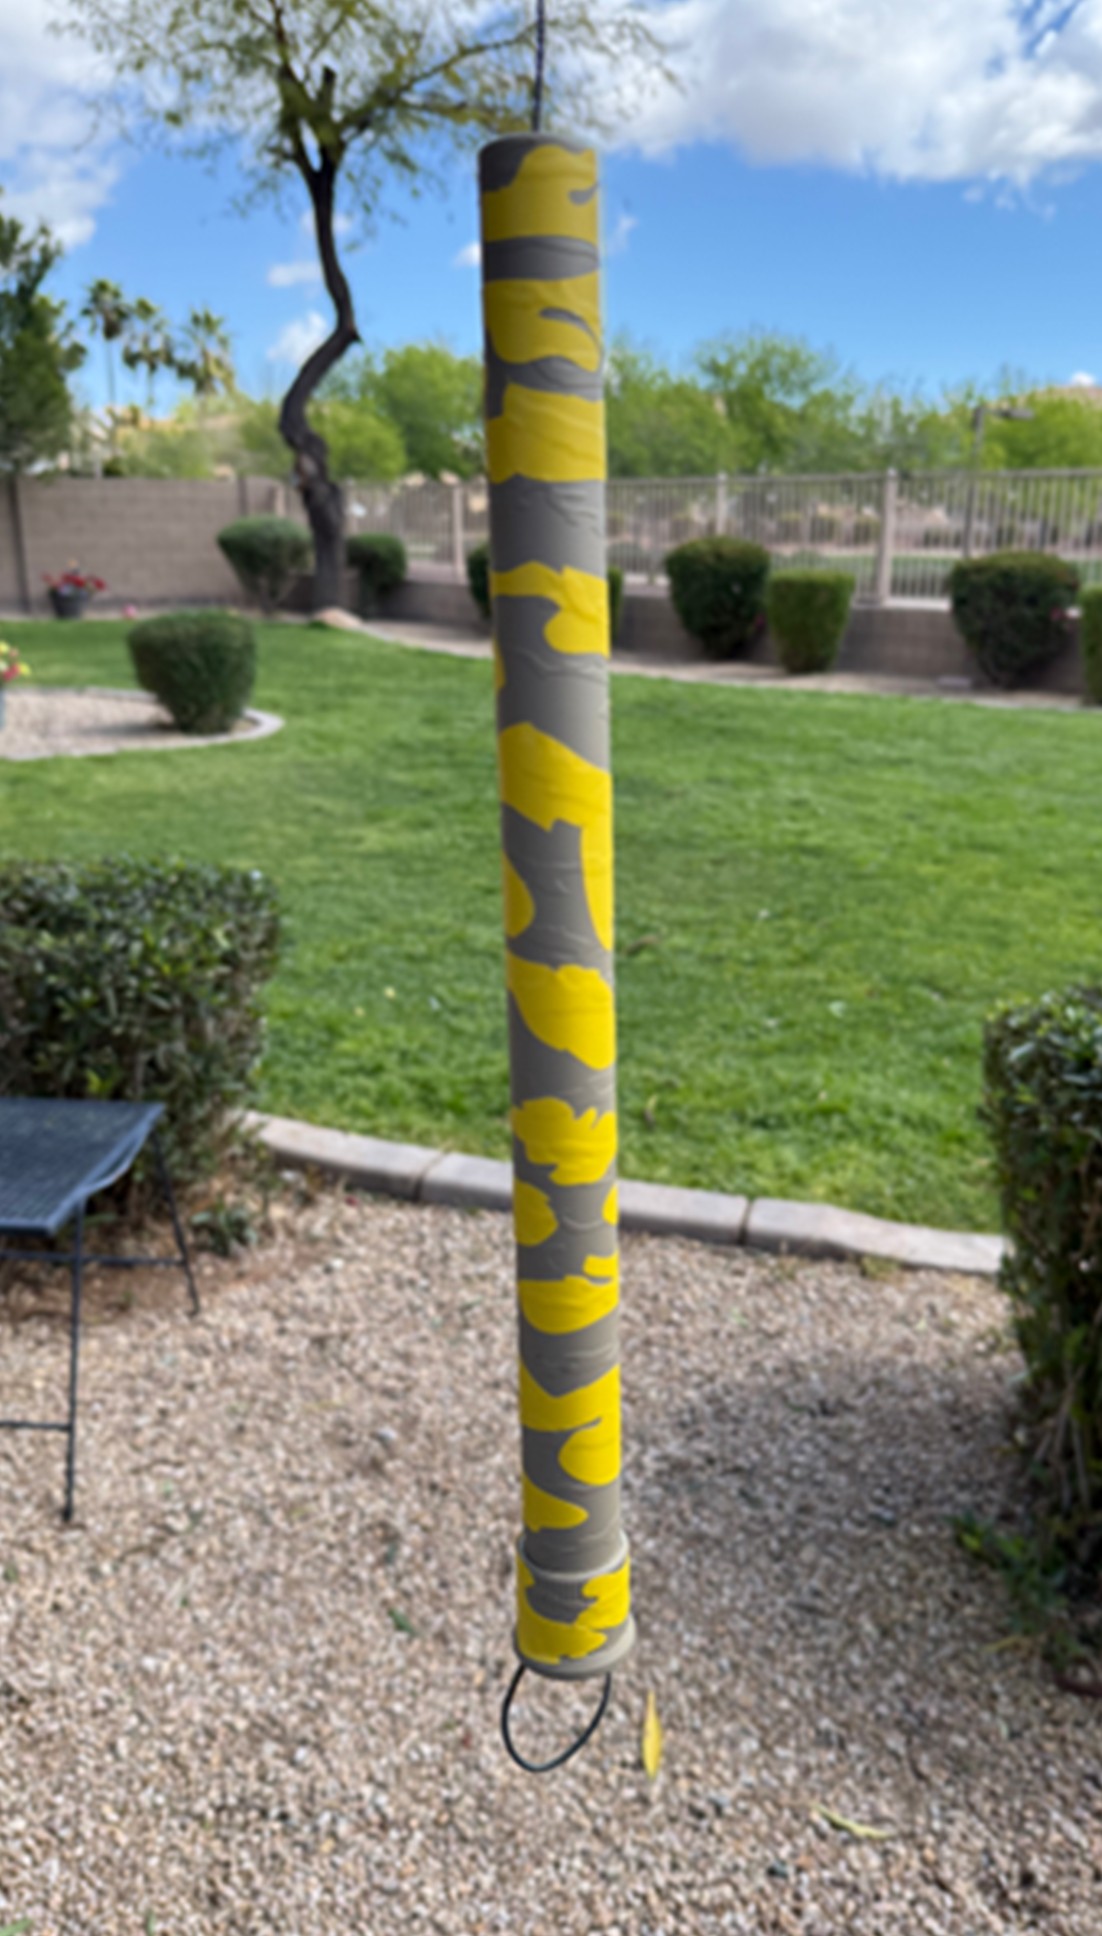
Step 4: Apply Second Set of Stencils
Once the first color is dry, apply your second set of stencils. These should go over the first
color to break up the pattern and add more depth.
Step 5: Spray Second Color
Now hit it with your second color—I used Flat OD Green. Again, spray evenly and let it dry
completely.
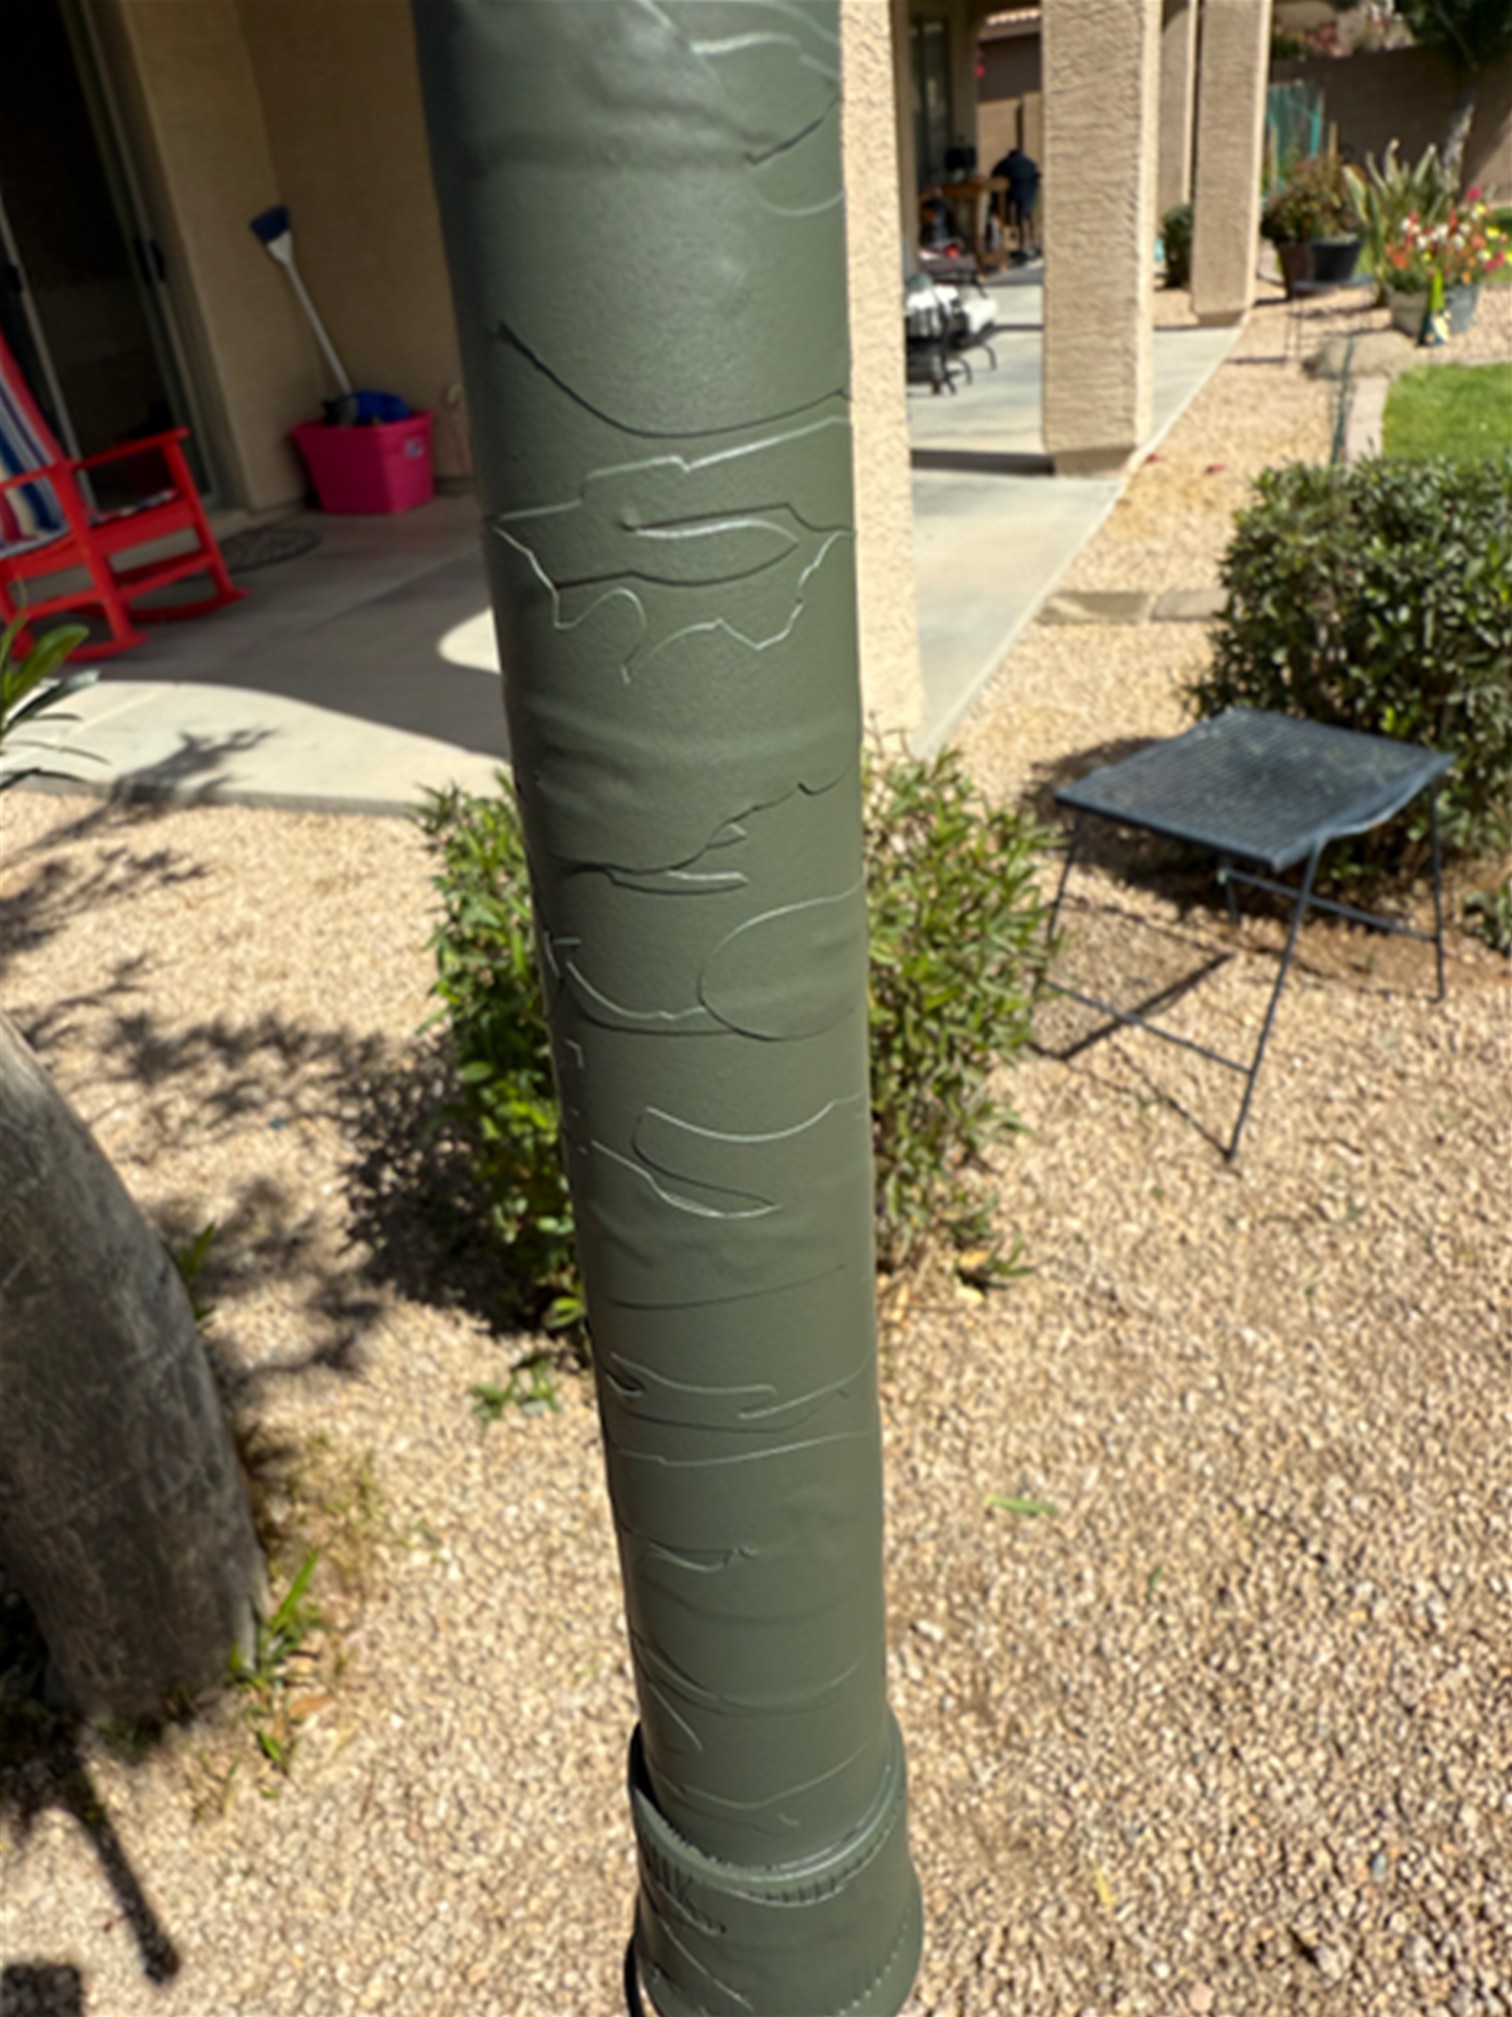
Step 6: Peel and Reveal
Once everything is dry, carefully peel off all the stencils to reveal your custom camo pattern.
Final Thoughts
This is a pretty simple project, though it does take a bit of time. I think the finished
product is worth it. Whether you’re going for a functional turkey gun or just want to give
your shotgun a custom look, give this a shot.