
| Articles | Documents | Equipment | Events | Links | Membership | Miscellaneous | Scrapbook | Targets | What's New |
| Coffee Table Reloading Kit | January 2012 | ||||
| Dan Martinez
| |||||
|
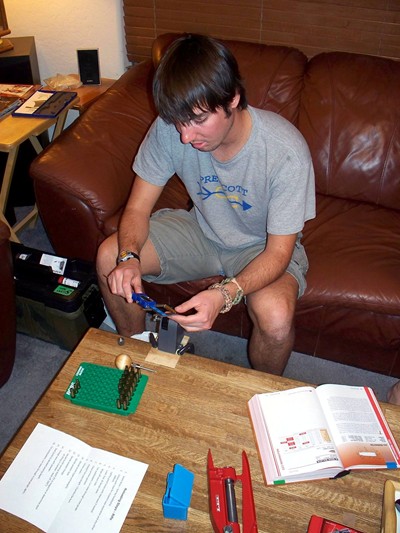
Well my oldest son Ben just reached the ripe old age of 21. He’s up in
Flagstaff these days where he is in his third year at Northern Arizona
University. He lives off-campus, sharing a place with three other dudes.
I decided that what he needed for his birthday was his first reloading
kit. Remember that he has a Thompson-Center Contender carbine in caliber
6.5mm TC/U. The only way to feed that little rifle is with handloaded
ammunition. Up to now, I’ve done all the ammunition manufacture to keep
the TC running. But now that he is mostly on his own, a full-fledged
adult, I figured that it is time to turn over complete reloading
responsibility for the TC to him.
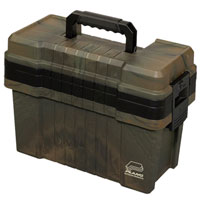
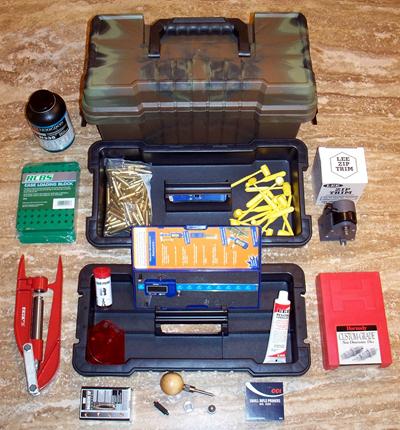
However, since he is not in a permanent living arrangement, what he needs
is a reloading kit that is portable and compact — something that can be
stuffed away in the closet when not in use. I decided to build him a kit
starting with a Lee hand press, that would all fit in a Plano model
1816-01 Shooter’s Case.
Lee is known for its inexpensive, but innovative and effective line of
reloading products. Lee has some unique solutions for most of the steps
needed to reload metallic cartridges. Building a complete, but
inexpensive coffee table reloading kit from Lee products makes a lot of
sense.
Let’s start with the Lee hand press itself. Exactly as its name implies,
this is a real reloading press, that uses standard dies, that is operated
in your two hands. It cannot be bolted to a table to be used as a
standard bench press. Yet, it can perform all the operations that a
bench-mounted press can because it does use regular reloading dies. The
frame is aluminum, but the ram, the die thread insert, linkage, and the
pivot bolts are steel.
Midway USA was my primary shopping resource for assembling this coffee
table reloading kit. I purchased the Lee hand press in a kit which
included the press, a powder funnel, a tube of resizing lube, and a
priming set (shellholder die insert and punch), all for just $40.
To figure out the minimum set of tools that would be needed, I started
by putting together a step-by-step list of the typical operations that
I usually perform for rifle:
For step 14, I decided against including a powder thrower and trickler.
A powder thrower is really a bench-mounted tool. If the powder thrower
is out, then so is a trickler. I decided that a Lee powder dipper kit
would suffice for powder measurement purposes and would fit the theme
of inexpensive but effective. Cost: $10
So let’s now go back to the top of the list of steps to think through
what tools would be needed:
Step 1, select and sort brass — tool needed: case reloading
blocks. I purchased these locally at Sportsman’s Warehouse. Two are
needed. As operations are performed, one block holds the cases that
still need the operation to be performed, the second holds the cases
that have been processed. Cost: $7 each.
Step 2, check for defects — tool needed: homemade bent paperclip
feeler. Not included, but Ben was given instruction how to make one.
Step 3, lube, size, & decap — tools needed: Recall that case
lube was included with the hand press kit. Lube can be applied by
finger to cases. Size and decap: Ben was presented with the 6.5mm
TC/U Hornady dies and shellholder that we’ve been using these many
years.
Steps 4 & 5, cleaning cases, clearing flash holes: I gave Ben
some fine steel wool to hand polish cases when needed. Clearing flash
holes of corn cob polishing media not required.
Step 6, case gauging for autoloaders: Like brother Sam, Ben
recently put together his own AR-15 too. Sam added to the reloading
kit by giving Ben a set of .223 dies. To assure reliable operation
of reloaded ammo in an autoloader, all cases should go through a case
gauge both after resizing and again after the round is finished. This
weeds out defects such as bulged cases or other deformities which
could cause a jam. Sam also added a Dillon .223 case gauge to the kit.
This single piece is a little on the expensive side at $25, but I
consider it a necessity.
Step 7, clean primer pockets — tool needed: primer pocket cleaner.
Lee to the rescue once again with an inexpensive little tool. Cost
$2.09.
Step 8, deburr flash holes — tool needed: flash hole deburring
tool. Tool omitted as a luxury item that can be added later by Ben if
desired.
Step 9, Check/Trim case length – Deburr. Tool needed: calipers.
At the time of my order, Midway was having a sale on their Frankford
Arsenal electronic calipers for only $15. These are really nice and I
almost ordered two, one for myself, but I already have two old fashioned
dial calipers that are perfectly usable.
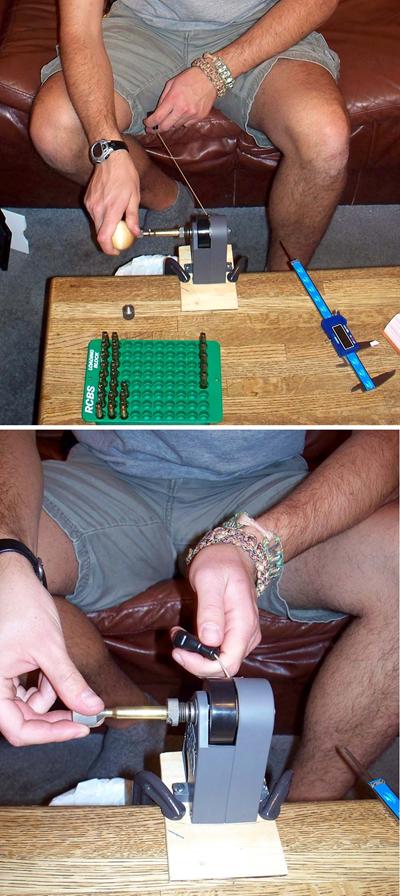
An option instead of the lock stud is a new Lee gizmo called the Zip Trim.
The special shell holder screws onto the Zip Trim device. There is a pull
string on the Zip Trim, like a lawnmower pull string, which when you pull,
spins the shell which is chucked into the shell holder. You apply the ball
handle case trimmer with case gauge to the shell while it is rotating, and
the shell is trimmed to proper length.
The Zip Trim device can be bench mounted. Or it can be mounted to a block
of wood. The wood block can then be clamped to the coffee table for a
temporary bench mount arrangement.
I also added the Lee Chamfer and Deburr tool to Ben’s kit for the staggering
sum of $2.79. After trimming, the chamfer and deburr tool can be applied to
the shell while it is still chucked into the Zip Trim to make quick work of
that operation. Pretty slick.
Step 10, prime cases. I mentioned earlier that the hand press kit
included priming tools. You have to feed each primer by fingers to the ram
mounted punch, but it works fine. I donated a Lyman primer flipper tray to
Ben’s kit that I no longer needed.
Steps 11 through 13, decide bullet, powder type and charge, cartridge overall length.
I included a pound of H335, 500 small rifle primers, and a box of fifty 100
grain .264” Nosler Ballistic Tip bullets. To that, Sam added one hundred 55
grain .224” diameter FMJ bullets for reloading .223 Remington ammo. Plenty of
cases for both 6.5 TC/U and .223 reloading were also included. That’s enough
to get him started.
But one of the most important things needed is information. Hornady offers
one of the most comprehensive reloading manuals on the market. They recently
brought out a fresh edition which I picked up. I then donated my most recent
prior edition to Ben’s kit. The major difference between the old and new
books is info on some new calibers and new Hornady bullets.
Step 14, charge case with powder. As mentioned previously, A funnel
was included with the press kit, and I decided that a Lee Powder Dipper kit
would be adequate. This kit includes 15 yellow plastic dippers in graduated
sizes, plus a chart that shows how much volume by weight each dipper scoops
for most common powders. When we tried it out though, we found that the
quantity of H335 that we wanted to throw was almost exactly between two dipper
sizes. One was too little, the next was too much. The limitations of dippers
became apparent.
So as a follow-up Christmas gift, I got Ben an inexpensive MTM digital electronic
scale. It is small and compact, but when we compared it to my larger (and more
expensive!) Dillon electronic scale, they read exactly the same for a sample
powder charge. Cost: under $30. He can throw the basic charge with the dipper
size that is below the desired charge, then trickle up to the exact weight using
a small dipper.
Step 15, seat bullet. For setting the cartridge overall length, this is
where the electronic dial calipers are definitely needed, even if they are not
really needed to check case trim length with the Lee trimming system.
Step 16, re-gauge finished cartridge (for autoloaders). Got it covered
already with the Dillon case gauge.
In assembling this kit, I was pleasantly surprised by the the low cost of most
of the pieces. All the Lee products, the calipers, and the digital scale are
perfect examples. Ben can upgrade or add pieces in time as finances and interest
dictate. But all necessary reloading operations can be performed with this basic
kit to produce quality reloads.
| |||||
| If you enjoyed this story, or found it useful, please consider clicking here to join the NRA at a discount of $15 off the normal membership cost. You will be supporting both this website and adding your voice in support of the Second Amendment. Thank you very much. |

|
|
|