
| Articles | Documents | Equipment | Events | Links | Membership | Miscellaneous | Scrapbook | Targets | What's New |
| Tree Stand for Longer Ranges | August 2021 | |||||||||
| Gerhard Schroeder | ||||||||||
|
Oh, so great that my 6.5 PRC shoots accurately, and that out to beyond five
football fields. The Mauser M18 has by now demonstrated that several times. That
is, shooting from what we typically call ‘bench (rest)’. Trouble is, when hunting
there is no ‘bench’. Or is there?!?
In Germany they have (plenty of) high stands. Not exactly a bench, on stilts, but
surely featuring wooden walls or rails to rest the gun or support hand on, and at
least one elbow. Then it dawned. Archery hunters so often employ tree stands at
locations they believe or hope game animals will show up at. That gave me the
idea for a tree stand. Not in a tree, but on the ground near one.
In November 2020 my shot at a whitetail came after waiting all morning next to a
juniper from where I had a fine view of the opposing slope. A few times I
carefully changed my position around that tree, moving with its shade. All I had
then was a Primos Tripod. Just as the archers, why not prior to the hunt stash
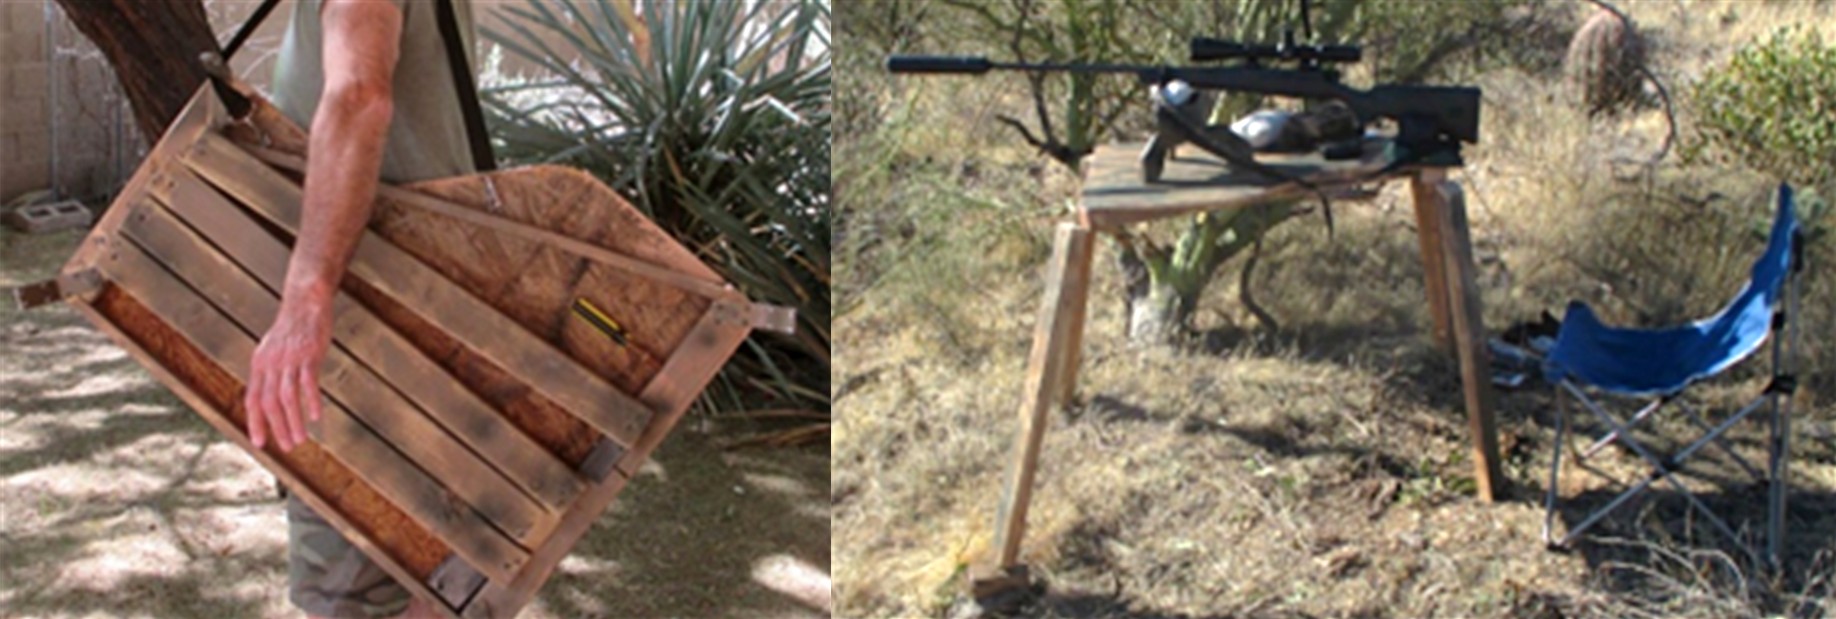
a tree stand – OK, not a stand but a shooting table! My criteria for such a
thing were: cheap to make so that if need be it could be abandoned; light enough
to carry it into position without risking a heart attack; and above all sturdy
enough to allow accurate aiming and therefore shooting.
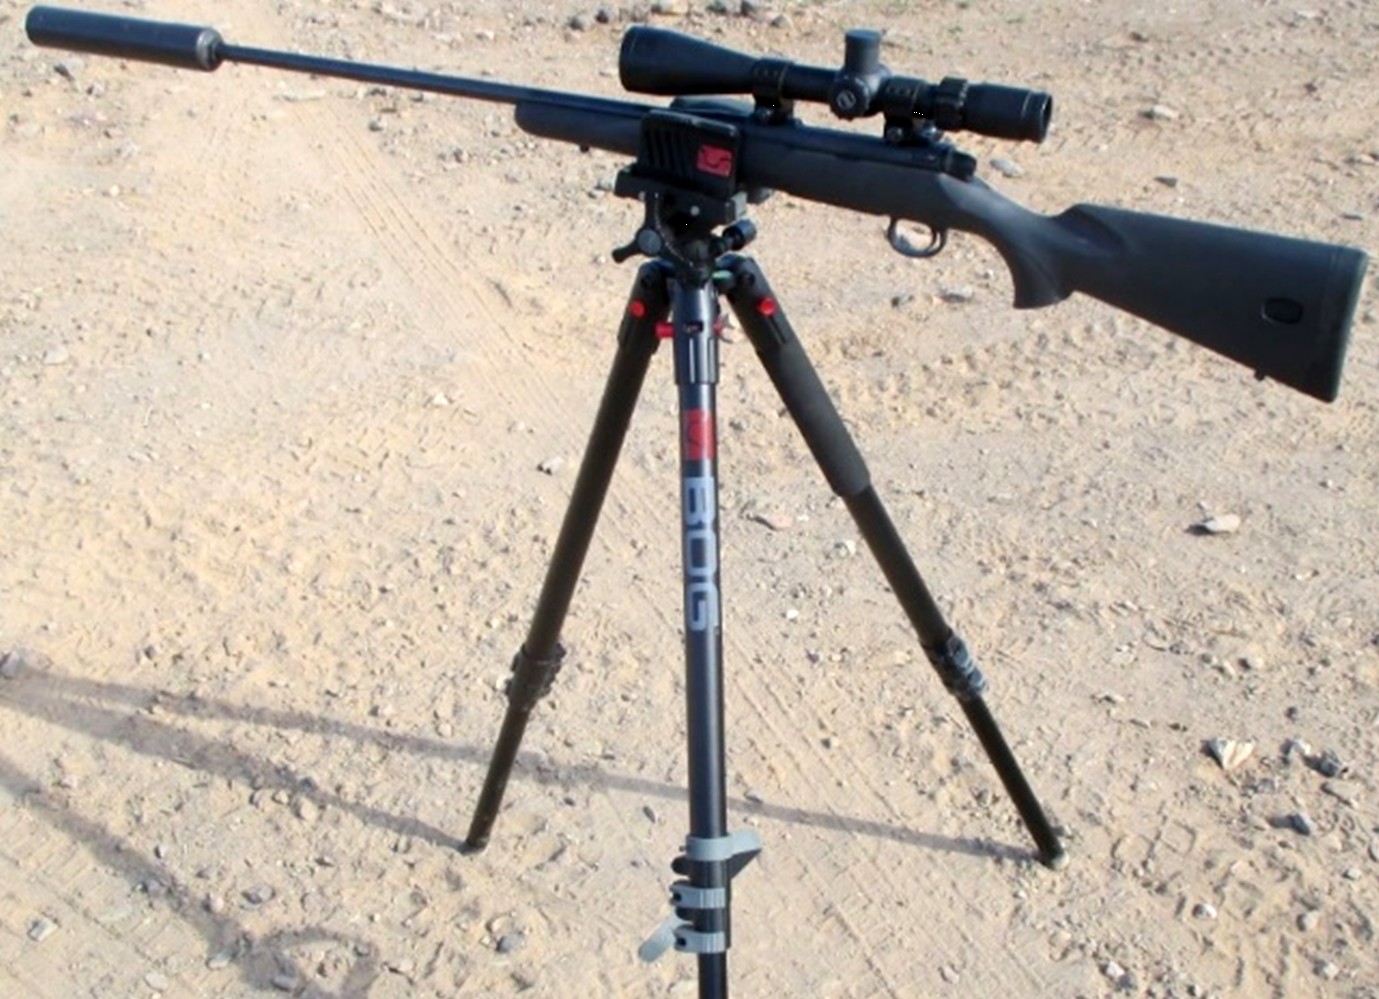
Two shooting ‘aids’ I already had for comparison: the Primos Tripod, and my usual
shooting table. That one, with four 1” steel pipes as legs, surely is stable,
heavy and expensive to make. The Primos Tripod obviously beats offhand or
kneeling unsupported. But after lots of shooting it simply does not provide the
steadiness I wanted – make that needed.
In early 2021 C-19 still affected the land. Time to think, plan and build some
field shooting tables. Note that lumber from, in this case Home Depot’s scrap
bin, is quite suitable.
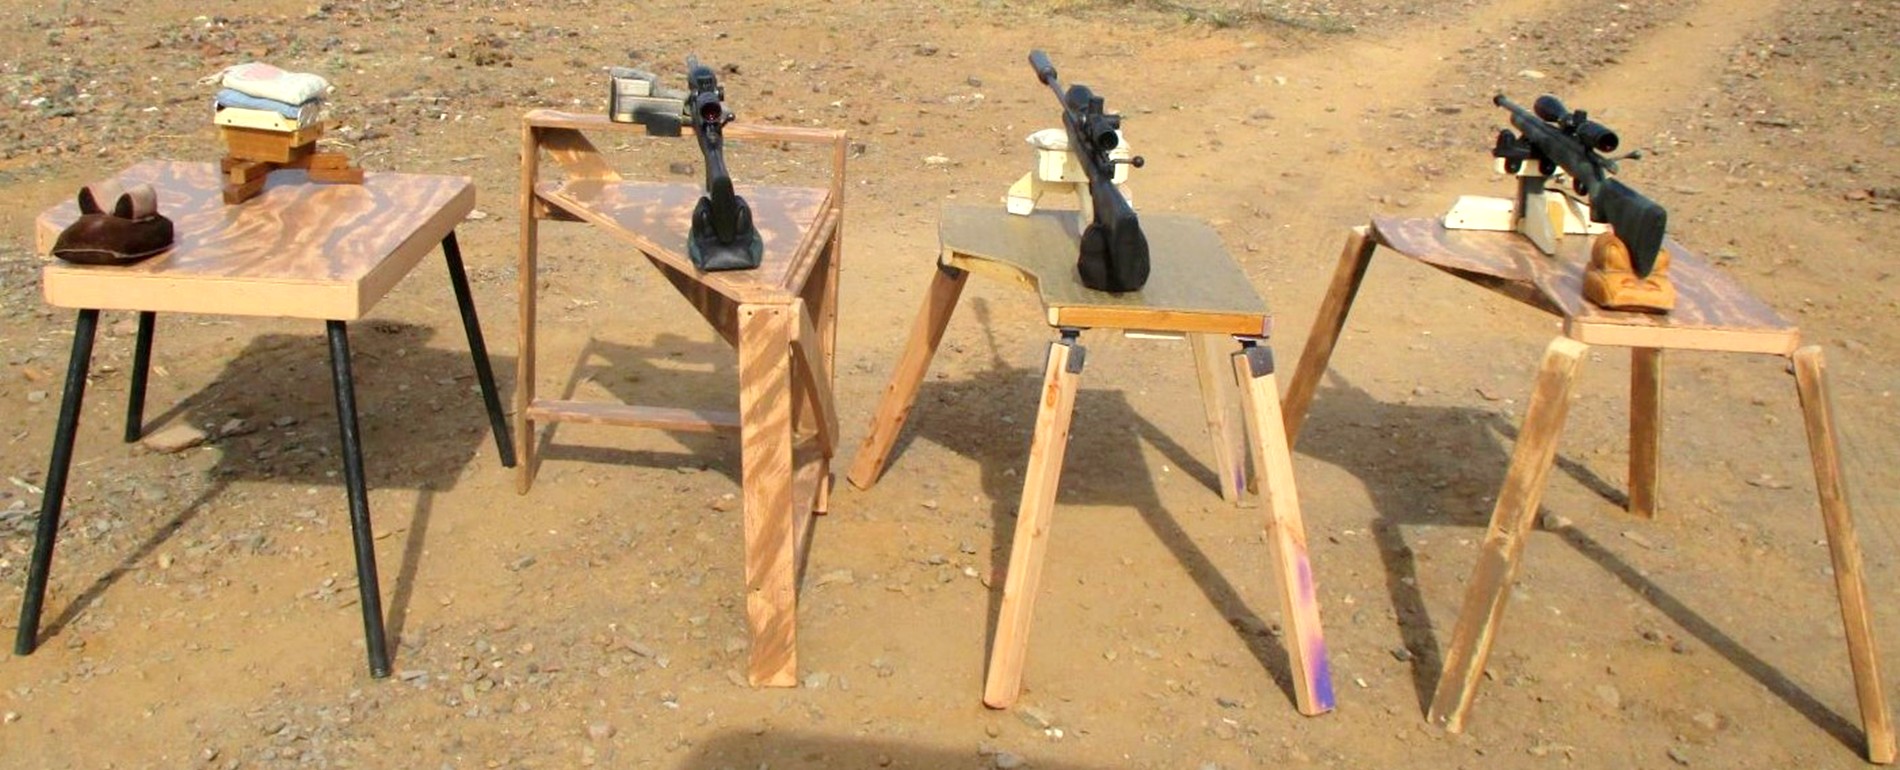
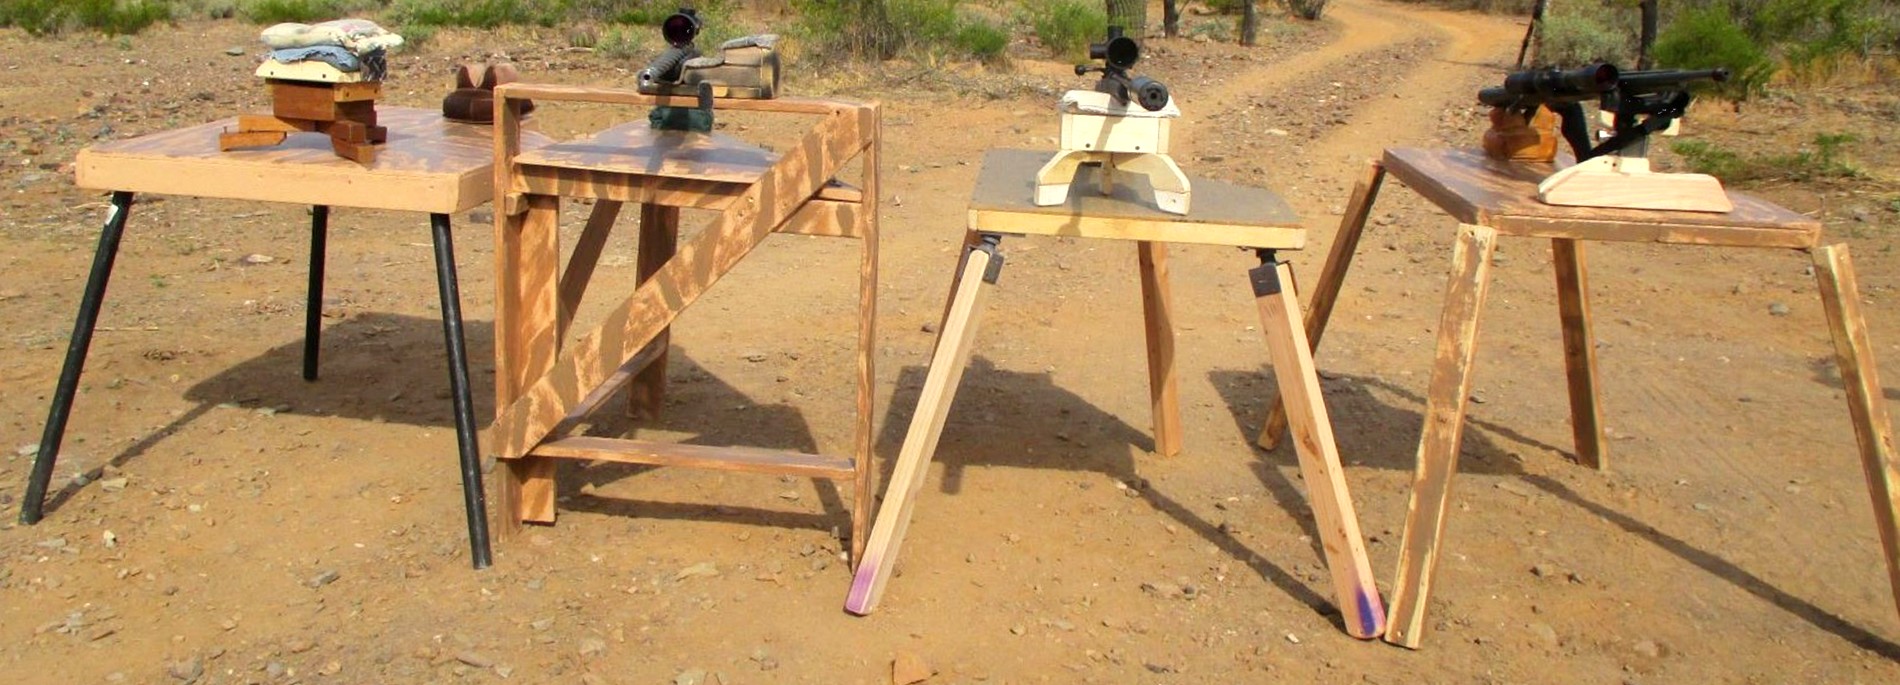
08 April 2021, little wind. Paper target 520 yds away. Here are the field
shooting tables I evaluated, using the M18 in 6.5 PRC and handloads with 135
and a few 140 grain Bergers.
First up was my old and trusted shooting table, the one shown here with
a longer wider top surface, steel legs and no gun on it. Shooting off that
provided a benchmark (d’oh).
Data is data – my 4 shots landed just right, with 3 going into 2.5”, and the
4th flying right to make it 5.8”. Nothing breathtaking, but
clearly every time a boiler room hit on even a small whitetail deer. Before
shooting again, I gave my scope 4 clicks. Note that these 4 shots were taken
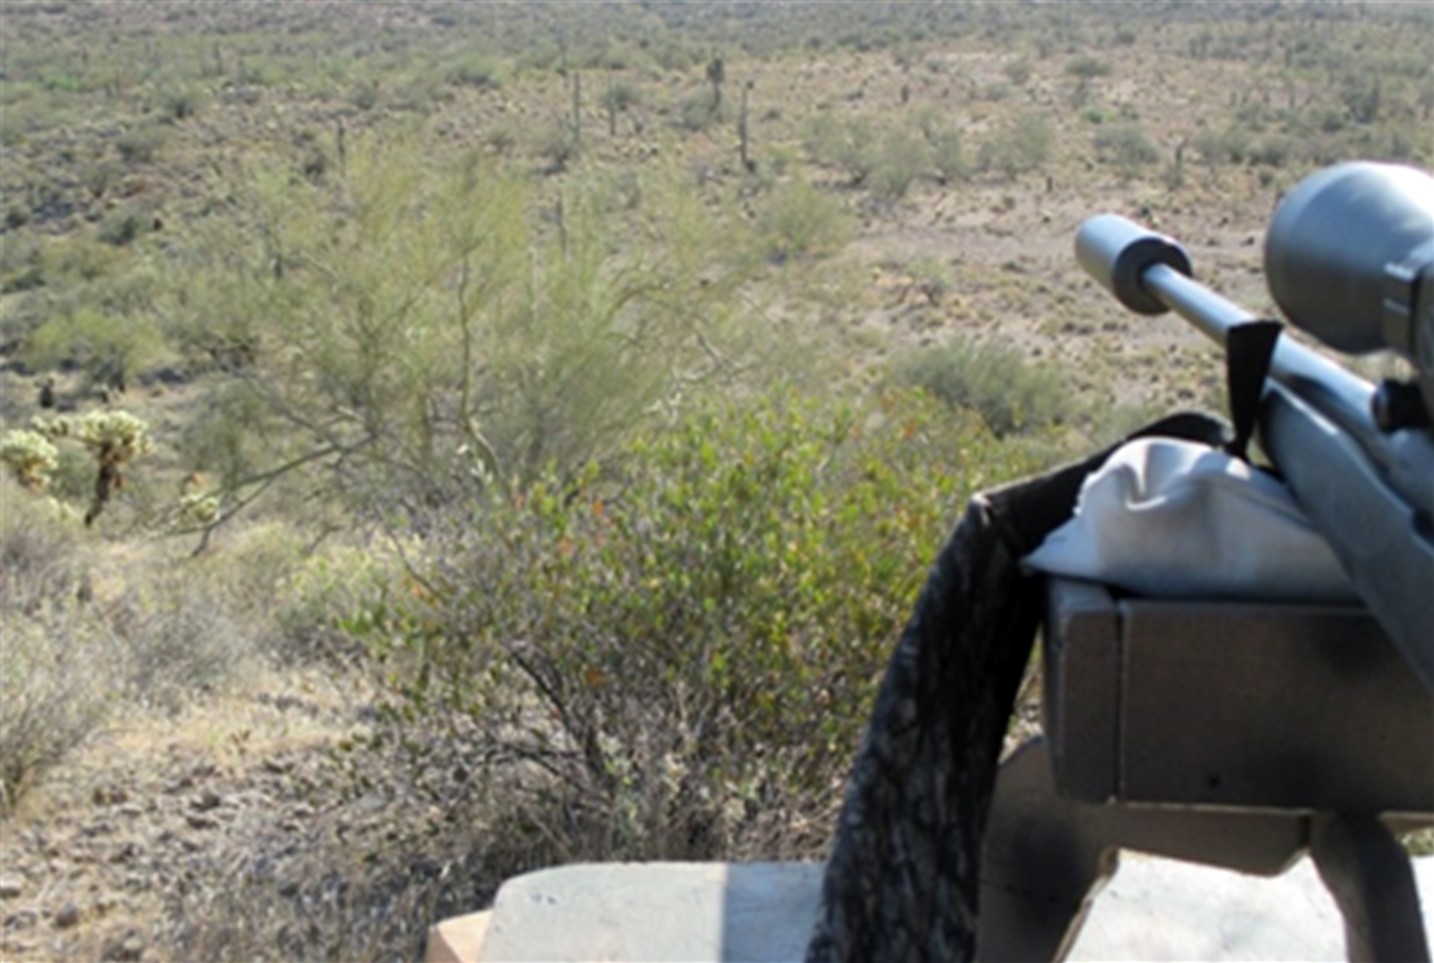
with typical sandbags in front and a heavy rear rest. The next shots reported
on below where all taken with a light field front support and light rear gun
rest, filled loosely with plastic beads. That all easily fits into a back pack.
Next up, the 3-leg design. 4 shots into 6.6” (best 3 into
5.2”). It has been my experience that light weight 3-leg shooting tables tend
to wiggle sideways, and it happened again here. That instability is even worse
when constructing the front and side sections with boards running flat – I tried
that first and dismissed such construction. But even that shaky 3-legger
provided more support than just the Primos Tripod. This table also took
the most effort of assembly, a minor consideration when the thing is set up
prior to the hunt. Constructed from mostly 1x3 boards.
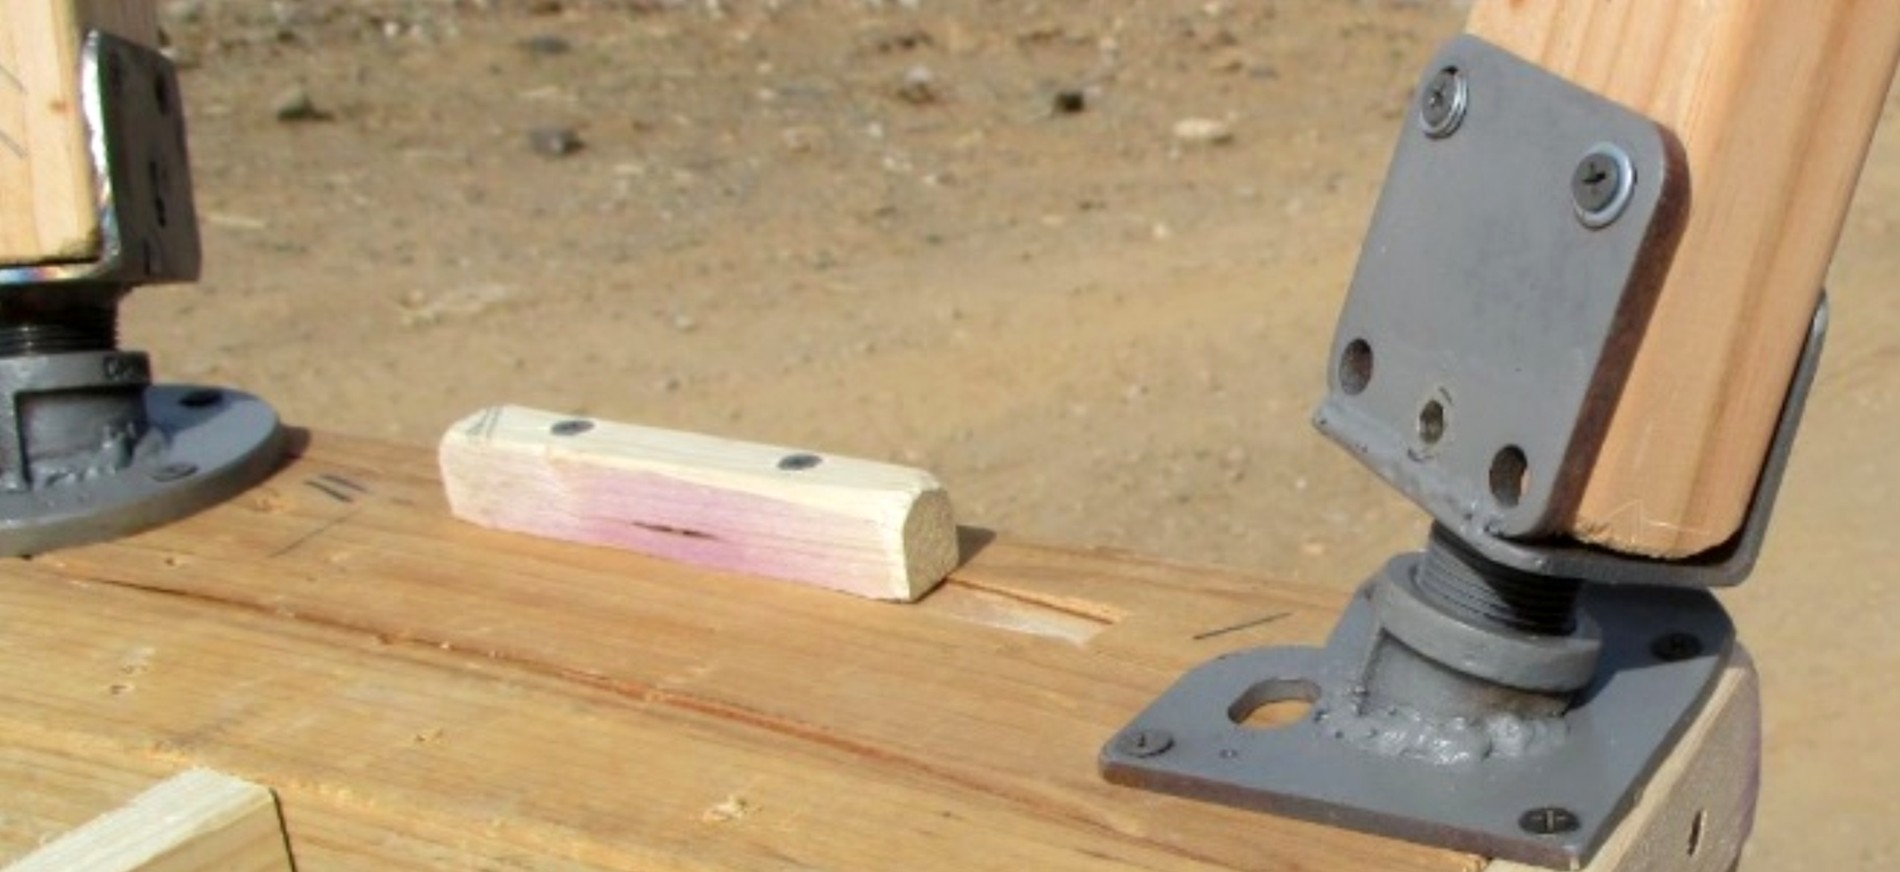
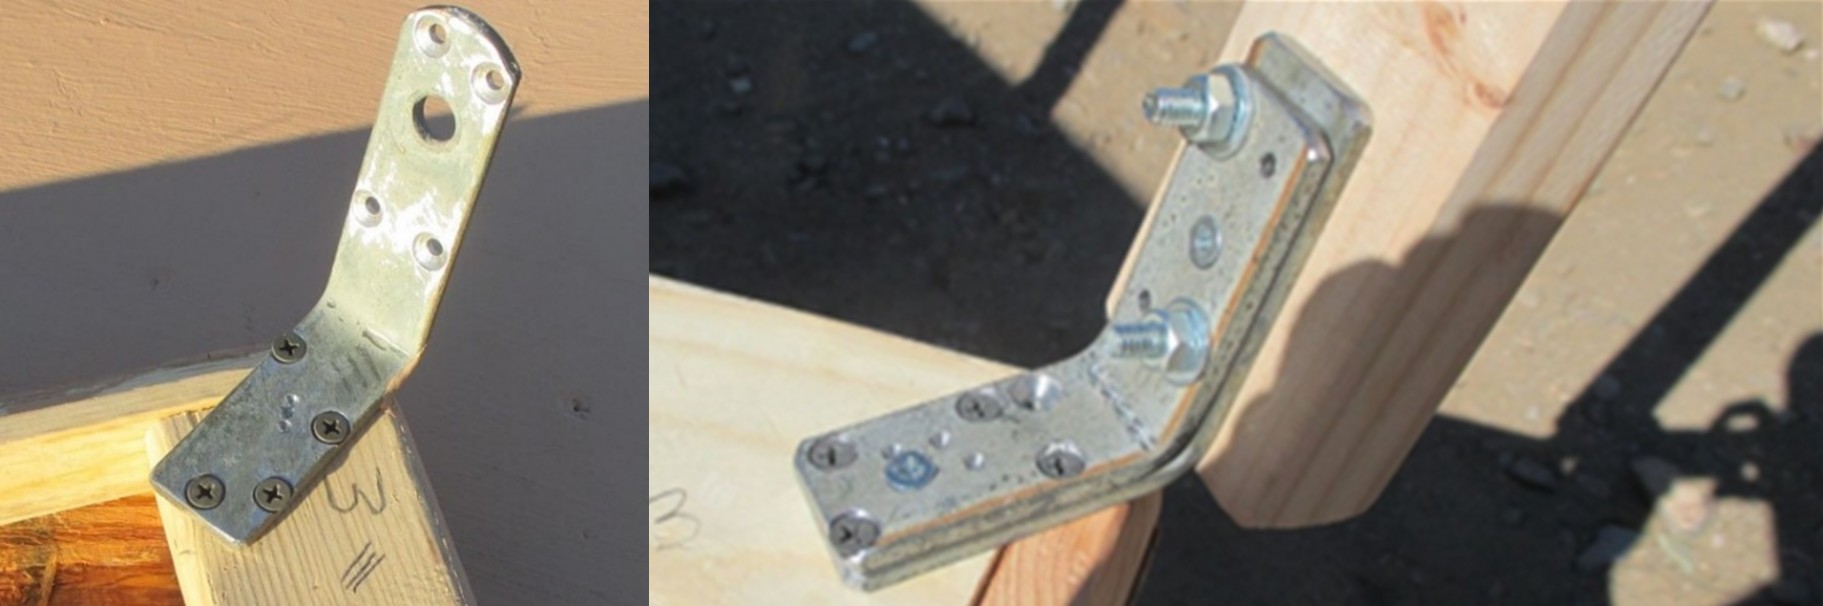
4-Leg design, bracket attachment. I happen to have plenty of 7/32
thick and 1.125” wide steel flat stock. But since it is galvanized,
welding is nasty, unhealthy, actually. Hence my idea to bend the stuff
into leg brackets, to about 120 degrees. Turns out this was the easiest
table to build, also the cheapest.
I had saved 3 shots to try the 3-leg table again (3 into 6.9”). 3-legs are
simply not as sturdy.
In total, at those 520 yds all 19 shots landed in 7.9 inches – dead deer
every time.
One thing to practice with this tripod is ‘roll’ or canting adjustments.
Meaning, getting the rifle / crosshairs to be level is only doable by
adjusting leg lengths accordingly. The tripod did not get a go on paper
because by then mirage no longer allowed to spot bullet holes. So I tried
the Deathgrip on a 10” steel plate at 680 yds.
David watched the target and said my shots were within inches. At the end
of that morning session I had two of the most accurate (N565 powder) loads
left over. The wind had shifted. Back on the 4-leg table I guessed and
aimed about one and a half plates left – hit! Ditto with the second shot.
Sure looks like the field table idea has merit.
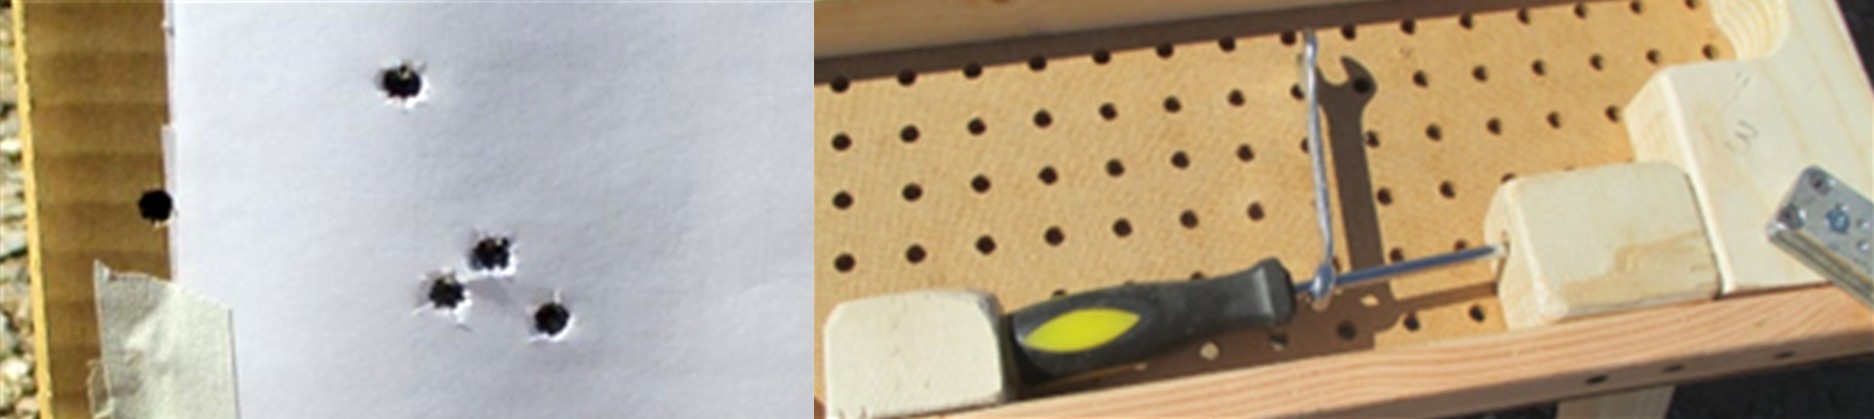
Back to the bracket design for a moment. With plenty of flat stock on hand,
what about doubling up? And using through-bolts? Even had enough lumber on
hand. So yes, another table got built. Attaching the legs with through
bolts is a lot simpler and faster. Tested that table on the same target at
520 yds (fairly easy for me to get to that position), with the same light
gun supports. As expected, stability increased noticeably, about the same
as the thread attachment design. Five shots landed in a 2.9” group, wind
and all.
Here the “Results”:
Bottom line is that the field table setup works as intended.
Final comments: Aside from stability, the 4-leg designs provide
noticeably more comfortable and more accurate aiming, BUT basically
for every repositioning of this type of table one leg needs to be
shimmed to get solid 4-leg ground contact. That is one aspect where
the 3-leg design has a leg up (missing!). Furthermore, AFTER the shot,
after recoil, I was able to get back to the target quickly. With the
3-legger I lost the target completely.
All we need now is again luck in the draw. For my next hunt (hopefully)
the plan is to have a field table positioned at location(s) where waiting
for a buck looks promising, and where ranges exceed 200 paces. That is
to be done prior to the hunt, just like archery hunters mounting their
tree stands. Would love to report on that.
| ||||||||||

| If you enjoyed this story, or found it useful, please consider clicking here to join the NRA at a discount of $15 off the normal membership cost. You will be supporting both this website and adding your voice in support of the Second Amendment. Thank you very much. |

|
|
|