| Articles | Documents | Equipment | Events | Links | Membership | Miscellaneous | Scrapbook | Targets | What's New |
|
Old Town Topwater 120 Pedal Kayak
Part 2 - Outdoor Adventures |
May 2021 | |||||||||||||||||||||||
| Dan Martinez | ||||||||||||||||||||||||
|
Here in part 2, I’ll talk about some of the outdoor adventures that I’ve had with it,
and I hope to be able to demonstrate just how versatile and capable it is.
As a Camping Kayak
I got in touch with Gerhard and my buddy Brad, both experienced river trippers, to see
if they would be interested in making this float. At first there was high excitement
for the trip, but as we dug in to learn more about the area, we learned that the full
trip would be 40-something miles, 25 of which we would have to cover in the first day.
Stopping overnight in the Cibola and Imperial wildlife refuges is not allowed.
The plan came to a screeching halt when Gerhard said that he was out. He had spent a
couple of days camping at Buckskin State Park, a different part of the river upstream
from where we would put-in. He said that the flow there was “lame”. He was worried
that there wouldn’t be enough current to carry us, and that we would have to be
paddling hard the whole way down.
I had developed my own doubts by that time, worried about how my knees would hold up
pedaling that far for that long. But I had a backup plan that I threw out there. I
had discovered a boat-in only campground on Saguaro Lake, called Bagley Flat. That
was about a 4 mile one-way trip from Butcher Jones beach – a significant distance, but
not one that would kill me/us. I let the thought marinate with the guys for about two
weeks before I announced a definitive date that I was planning to do it. In the end,
I went solo, which was fine.
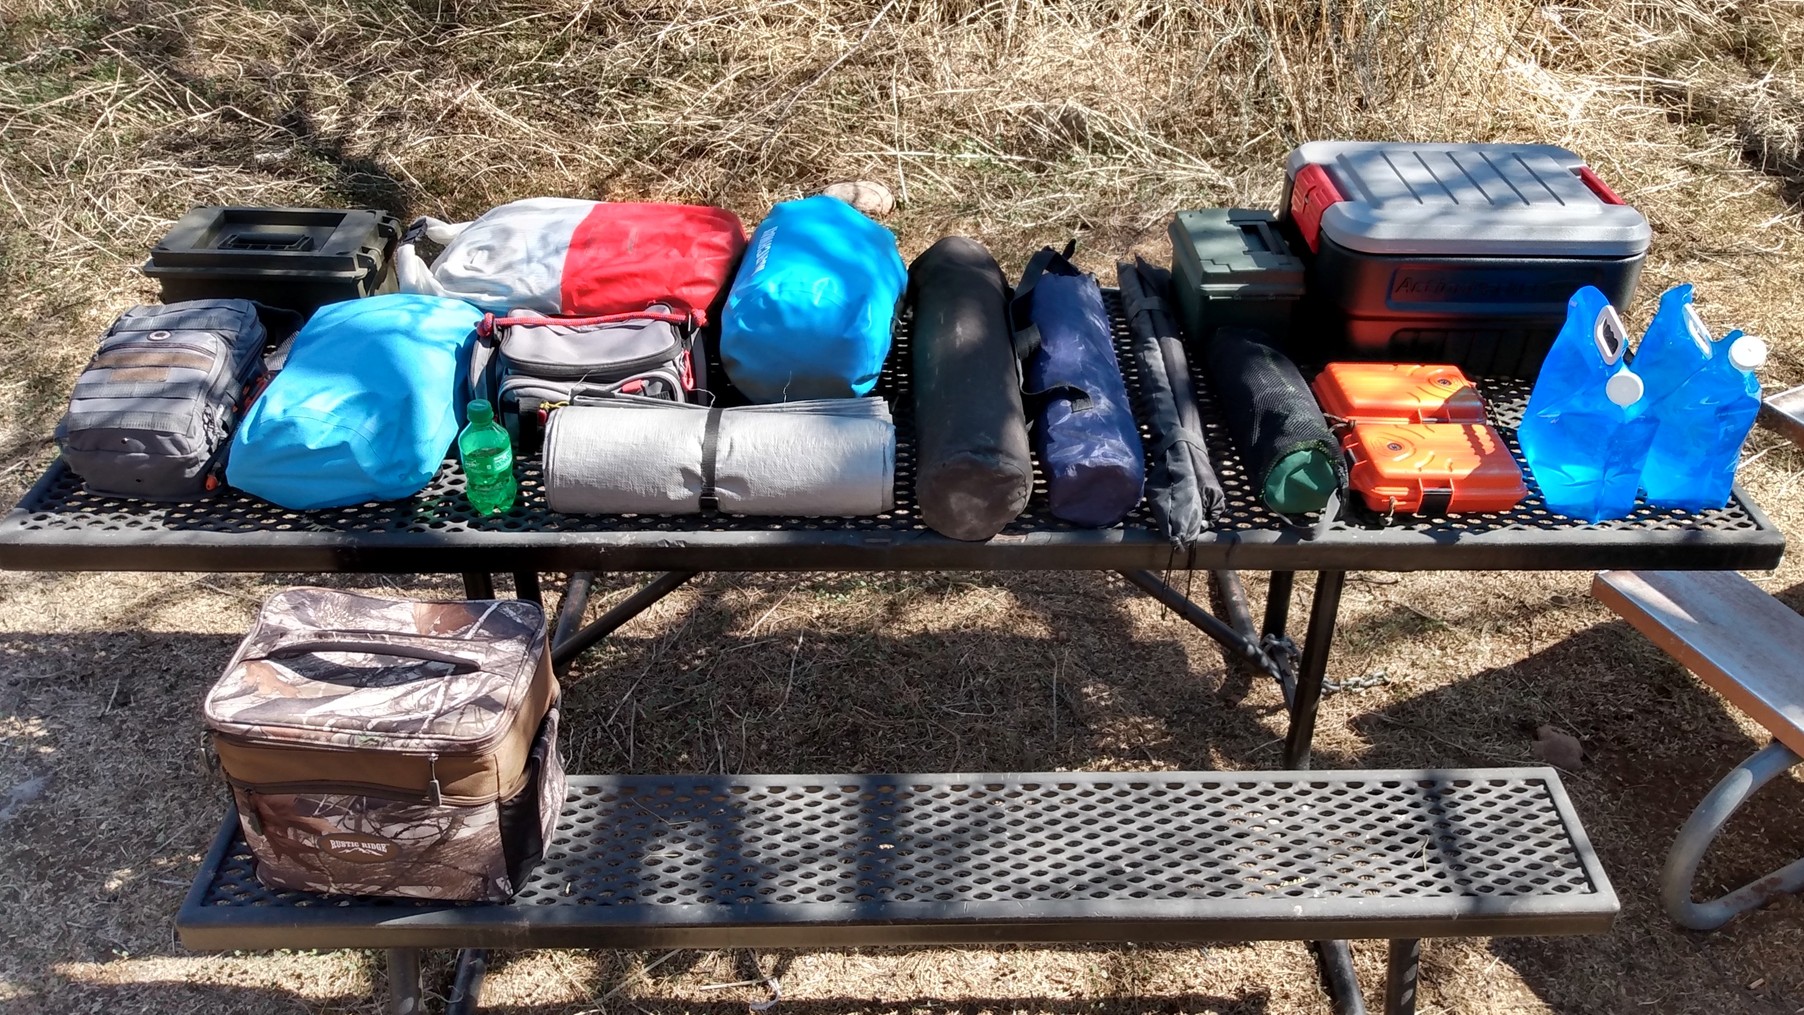
In my planning, I started from my ATV camping checklist to create my kayak camping
checklist. I could carry roughly the same amount of gear in the little boat as I
could on the quad. Again, this would be “backpack-style” camping, but with
significantly more comforts than you could ever carry just on your back.
Second, because of the shape of the boat’s double pontoon hull, it was an advantage to
create “sausage” packages of whatever gear lent itself to that shape. For example, the
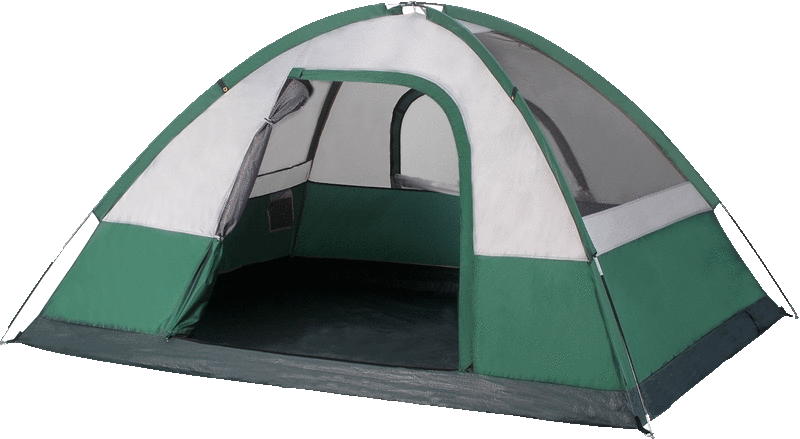
tent, sleeping mat, tent footprint tarp, camp chair, and tarp poles are naturally, or
can be made into long cylindrical packages. I hooked these packages together lengthwise
using mini carabiners, like sausage links, to feed them down the sides of the boat into
the pontoons of the hull, going in from the bow hatch. When you open the hatch and pull
the first one, all the links in that chain come out. This packing method was kind of a
cool realization.
On the way to the campground, all loaded up, I really didn’t notice a difference in
handling. Except for no car access, this was a regular Forest Service campground.
There were picnic tables, barbecue grills, and a pit toilet building there. It was a
nice place to spend a night.
As a Hunting Kayak
I camped at the high water line on the west shore but parked the boat at the water
in a nice little cove about 150 yards away. Using the canoe in years past, I’ve
done this hunt several times now. One of the things I learned was that if I’m away
on the opposite shore all day, it’s very possible, if not probable, that when I
return, I will find that I no longer have a place to park my boat, because campers
have moved in while I was gone.
This time I was smart. I brought a second pop-up canopy, an extra table and some
chairs, and setup a “boat house” at the water in my cove. I was laying claim to
that spot! And it worked great. From Friday noon, all the weekend party campers
started arriving and soon the area was an absolute shit-show of mayhem. But my
kayak parking spot was respected and secured.
When the light arrived, I was a bit disappointed because it did not seem very
bright. But when I actually used it on the water in the dark, I realized that it
was quite bright enough. In the dark, it seemed to be much brighter, plus when
you are on the water, the water reflects the light all around, making the little
light seem much bigger than it is.
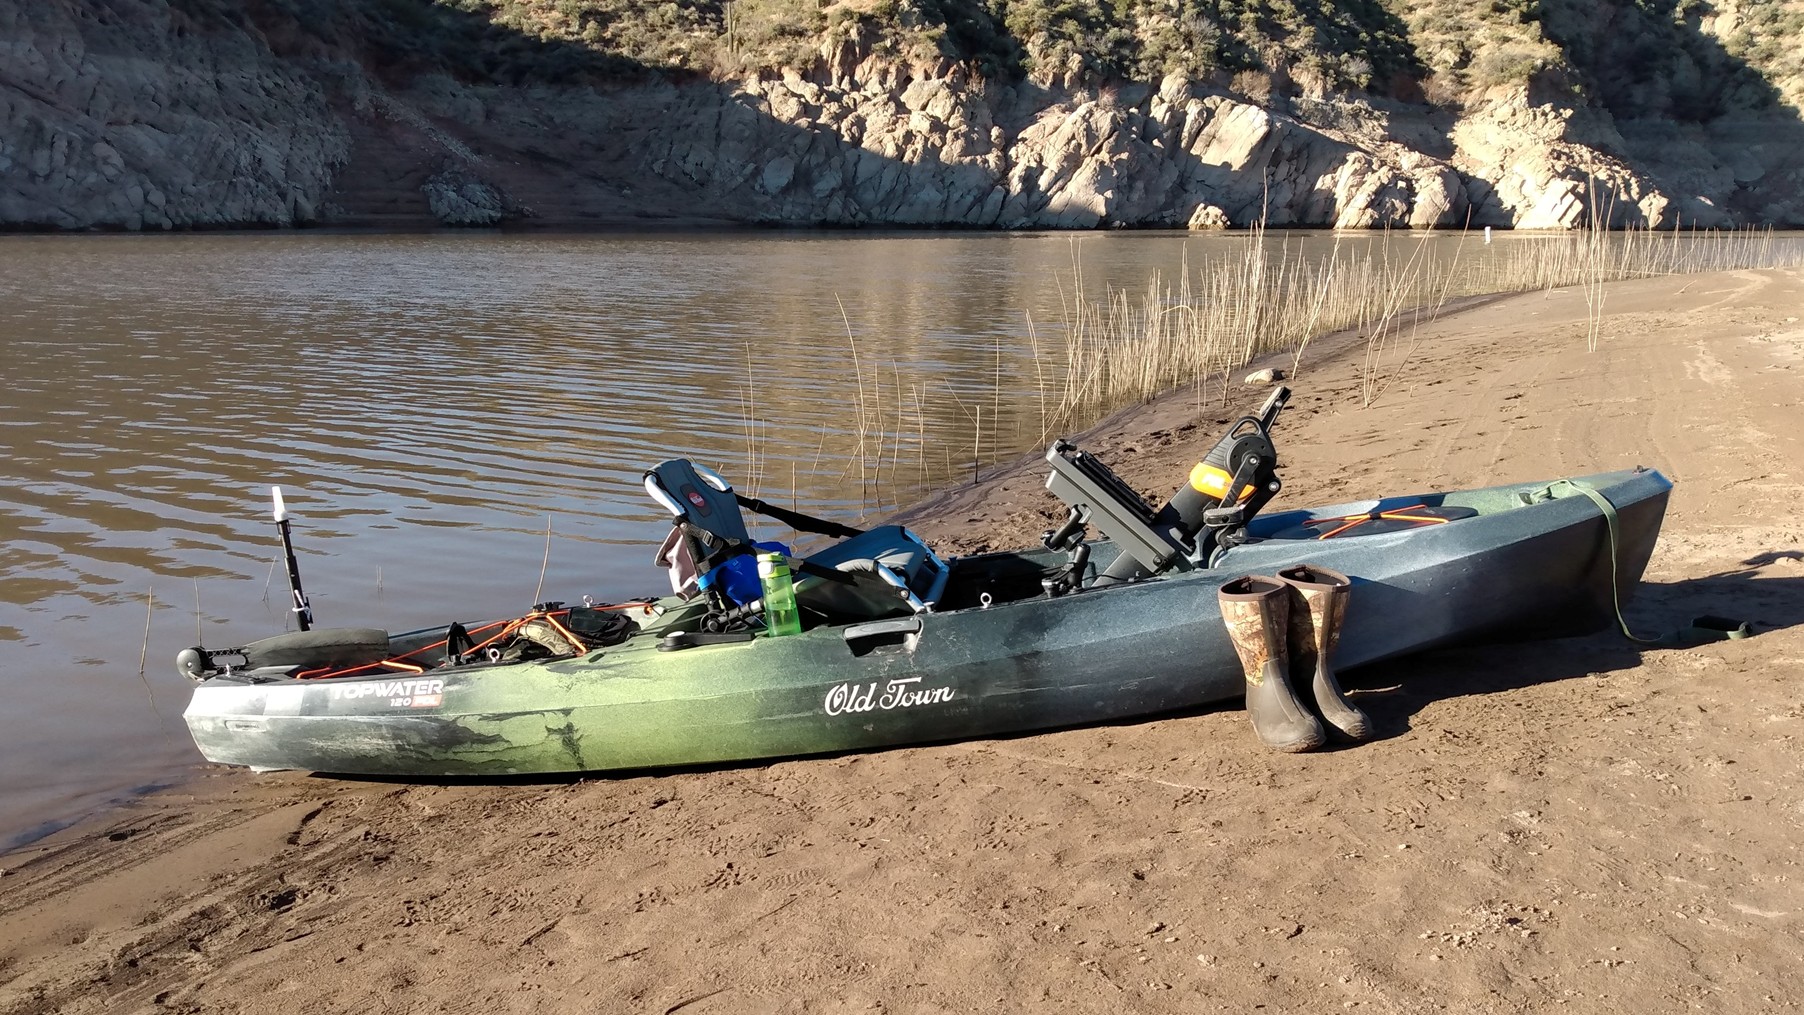
I also got adept at footwear changes. To launch and land a kayak on a beach, you
have to get in and out of the boat with your feet in the water. I got a pair of
12” high Muck Boot clones from Sportsman’s Guide. These were cheaper than genuine
Muck Boots, but they do the job just fine. They are a little thinner/lighter
compared to the genuine article, but they work well for my intended purpose. They
are also comfortable to pedal in.
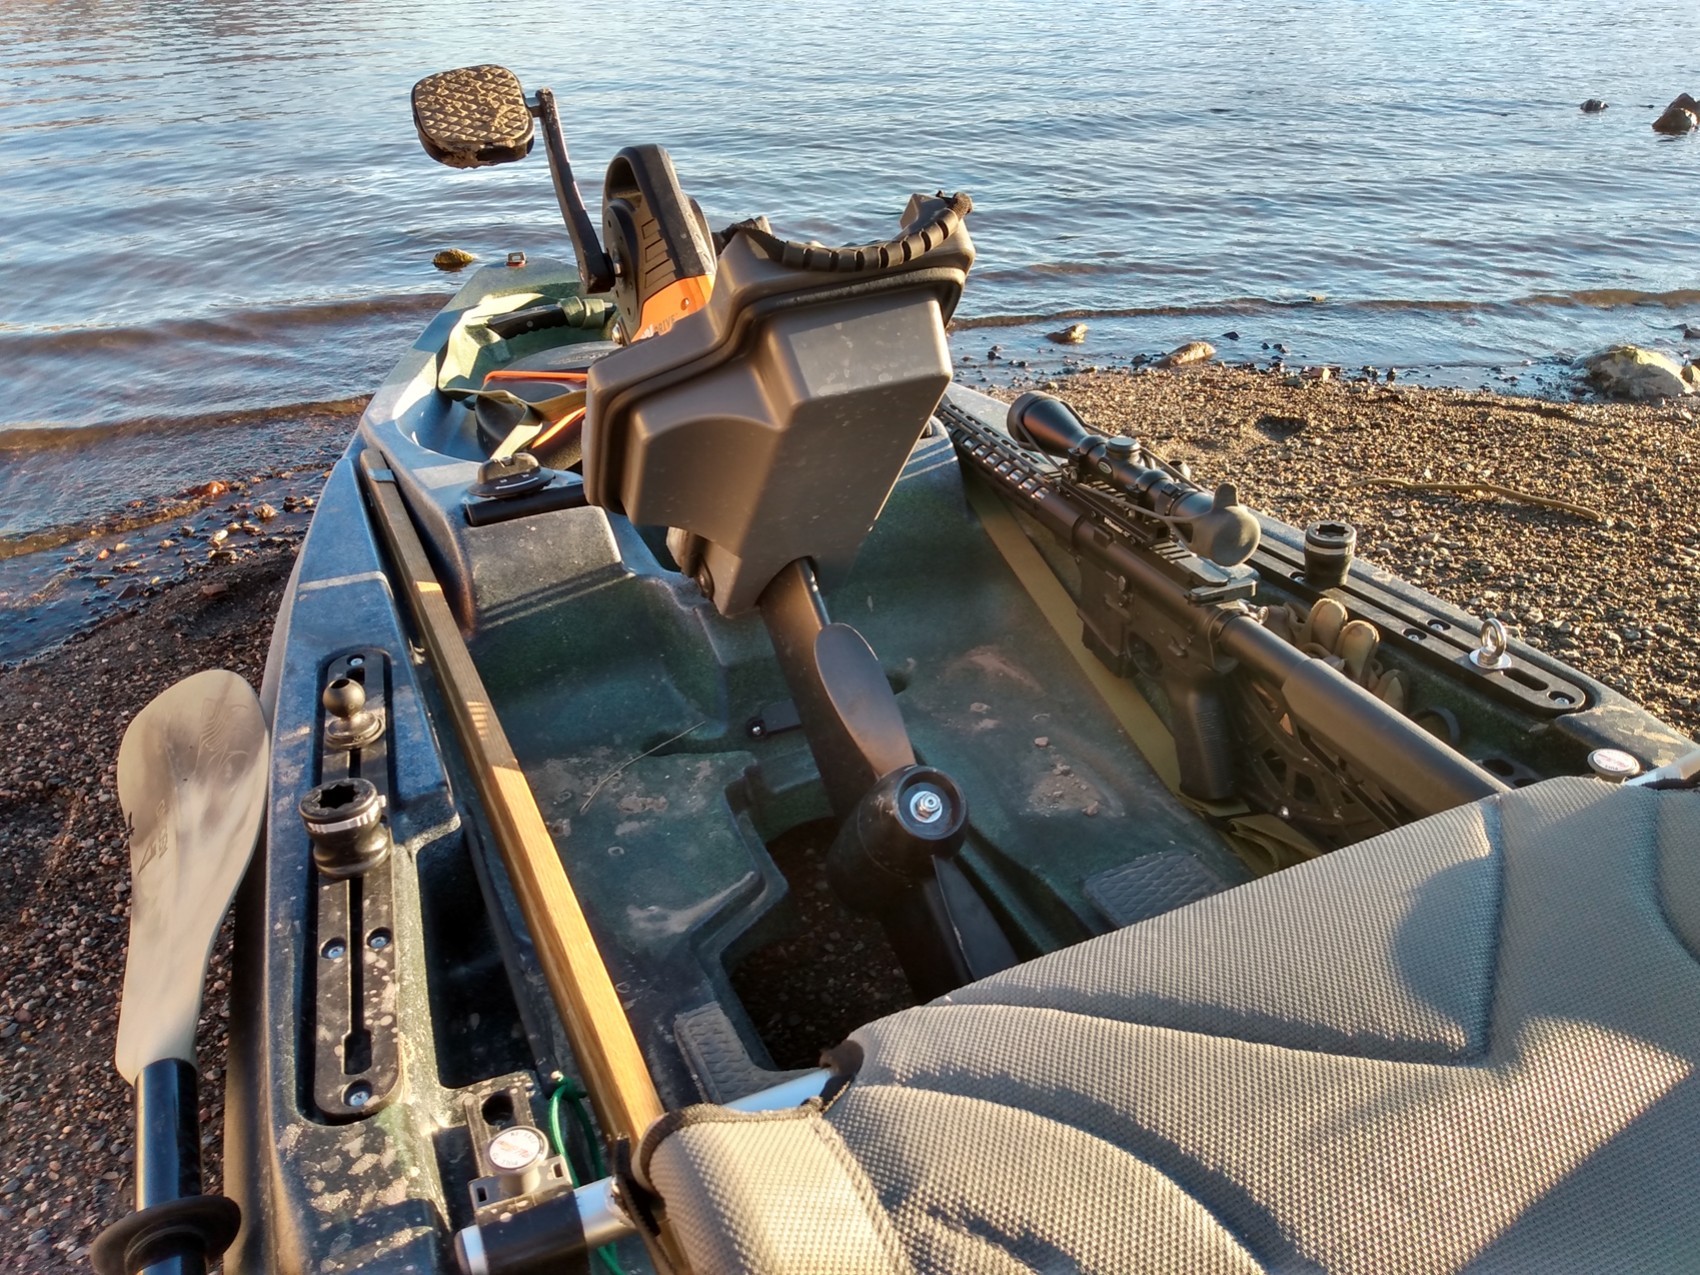
One neat feature of the boat that was quite handy on the hunt, is two grooves that
are molded in to the hull at the bow, on either side of the dry hatch. These grooves
are intended as horizontal fishing rod storage spots. For hunting purposes, my rifle
and my shooting sticks rode there quite nicely. I believe that Old Town intended
that these grooves can be used for guns as well as rods, as they also market these
kayaks to duck hunters.
As a Fishing Kayak
But my readers are from the blast and cast, bullets and bait crowd, hunters and
fishermen. You likely could care less about geocaching, so I won’t talk about
that here.
I have spent a little time wetting a line with this boat, and I’ve got a feeling
that I’m going to be spending more time fishing with it. It really is an ideal
kayak for that purpose.
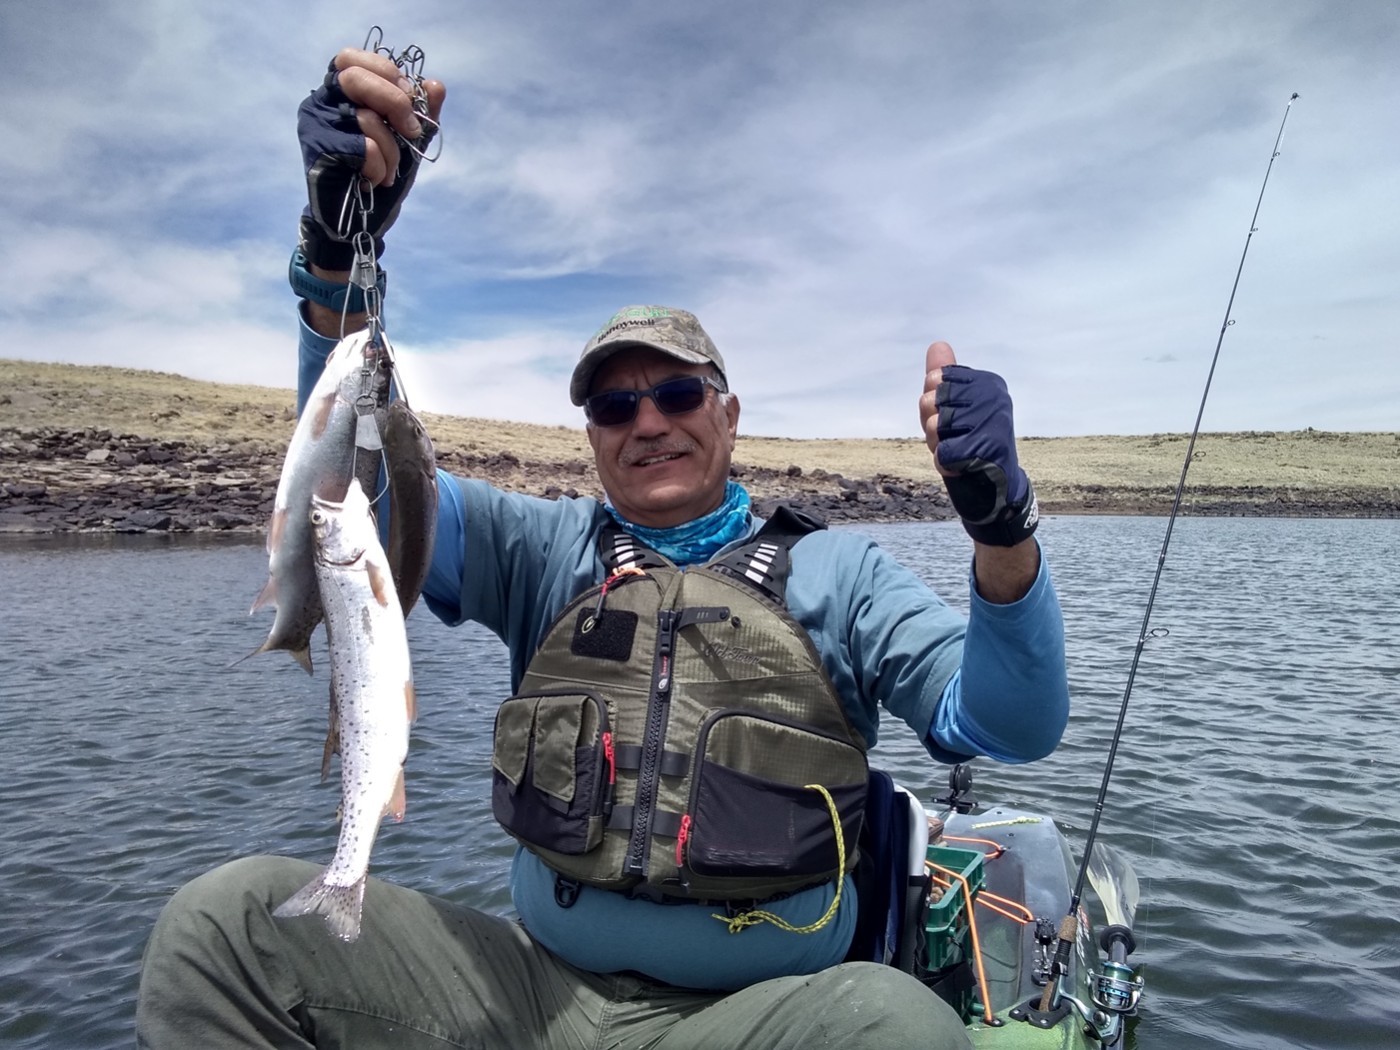
I can proudly say that I caught my first Tiger trout with this boat on Woods Canyon
Lake! If I remember correctly, he hit on a small Super Duper. The Tiger was a
small one, but hey, a first is a first!
While fishing there, I did try the technique of dragging bait under a bobber down
a shoreline by slowly pedaling backwards with the line out in front of me. That’s
one of the unique capabilities of this boat, being able to propel yourself backwards
in a controlled manner. That was kind of cool, but no luck yet using that technique.
The first time I tried fishing in the Topwater, I had one forward-facing rod holder
mounted on the accessory track in front of me. I learned that I really needed two
rod holders, one mounted on each side, so that I could easily fish on either side
of the boat by simply moving the rod. I bought a second one, so now I do have two.
I was drawn for a turkey hunt for early May in Hunt Unit 1. Since the turkey
hunting is basically over when the birds stop gobbling each day by maybe 9:00 am,
my plan was to spend some time fishing on Big Lake to try to catch some trout. To
my mind, Big Lake is Arizona’s premier high country trout lake. To make things
better, the road in is usually closed until late April, which means that the trout
have seen no pressure all winter and will be unwary.
To the extent that I am a fisherman, I am a trout fisherman. Though I might try
bass or crappie fishing, I’m really not that interested in the warm water species.
That’s just the way that I was brought up by my Pappy.
Installing a Fish Finder
I’ve talked about how the Topwater has a double-pontoon hull. I explained that
the center of the hull is largely concave. The transition from the V at the
bow, to the center concavity forms a step on the bottom, just forward of the
pedal drive. This provides a protected pocket to mount a sonar transducer.
Old town has molded-in two threaded brass inserts in the hull, to which they
have mounted a plastic plate with numerous holes. This is supposed to be a
universal transducer mounting plate. It seems that this plate will accommodate
just about any Humminbird transducer (another Old Town sister company), but not
most Garmin transducers.
I was a total dummy when it came to fish-finders. Fortunately, in this day and
age, researching something that you have no clue about is fairly easy. The
Garmin Striker 4 is popular with kayak fishermen because it is compact,
feature-packed, and affordable. I chose the upgraded version, the Striker
Vivid 4CV. It wasn’t hard to sell me on Garmin, because I am a long time user
of Garmin GPS units for my geocaching hobby (I probably buy a new one every
two years, due to hard use!), plus I wear a Garmin Instinct GPS fitness watch
on my wrist every day.
The scupper hole just to the rear of the transducer mounting location was
placed there by Old Town specifically to allow routing a transducer cable up
to the deck. Just above the top of the scupper hole, I drilled a hole in the
hull and routed the transducer cable into the front hatch area through a
waterproof bulkhead fitting.
The transducer cable that Garmin provides is about 20 feet long so that
regular boats can mount the transducer at the back of the boat on the transom.
This installation needed nowhere near that length of cable, so I had a lot of
extra cable to coil up and stash inside the hull.
The last piece of the puzzle was powering the unit. The fish finder runs on
12V DC. A small AGM battery of 7 to 9 amp-hours is all you need for a full
day of fishing.
I decided that what I wanted to do, as long as I needed to house the battery
somehow, was to build another solar power box, my smallest and simplest one
yet, but still fully functional.
Sportsman’s Warehouse had these neat mini plastic ammo cans, measuring 8.5”
long x 7” high x 4.5” thick. These are the perfect size to house a 9 amp-hour
AGM battery. I bolted on a cheap Amazon solar charge controller on one face,
added a switch and a few connectors, and I was in business. I found a soft
folding 30 watt solar panel which was perfect for charging this mini solar
power box. With four total USB outputs plus a two-pin SAE connector for
powering the fish finder, it can be used for charging or powering electronic
devices while kayak camping, as well as powering the fish finder.
The battery box goes down into the front hatch. I use a webbing strap with a
click buckle to secure it to the same scupper hole tube that the transducer
cable goes through. I run both the transducer cable and the power cable out
over the edge of the hatch rim with the hatch cover in place. These two cables
then connect to the back of the fish finder display unit. I had fun fabricating
and figuring this all out.
OK, but why a fish finder? Yeah, it’s cool to be able to see fish below you,
but what I think is more important is to see the depth of those fish relative
to the depth of the bottom. There are a number of different displays/modes
that the fish finder has, that allows you to see fish that you’ve already passed
over, fish that are under your boat right now, and the depth and type of any
underwater structure (rocks, brush, or trees).
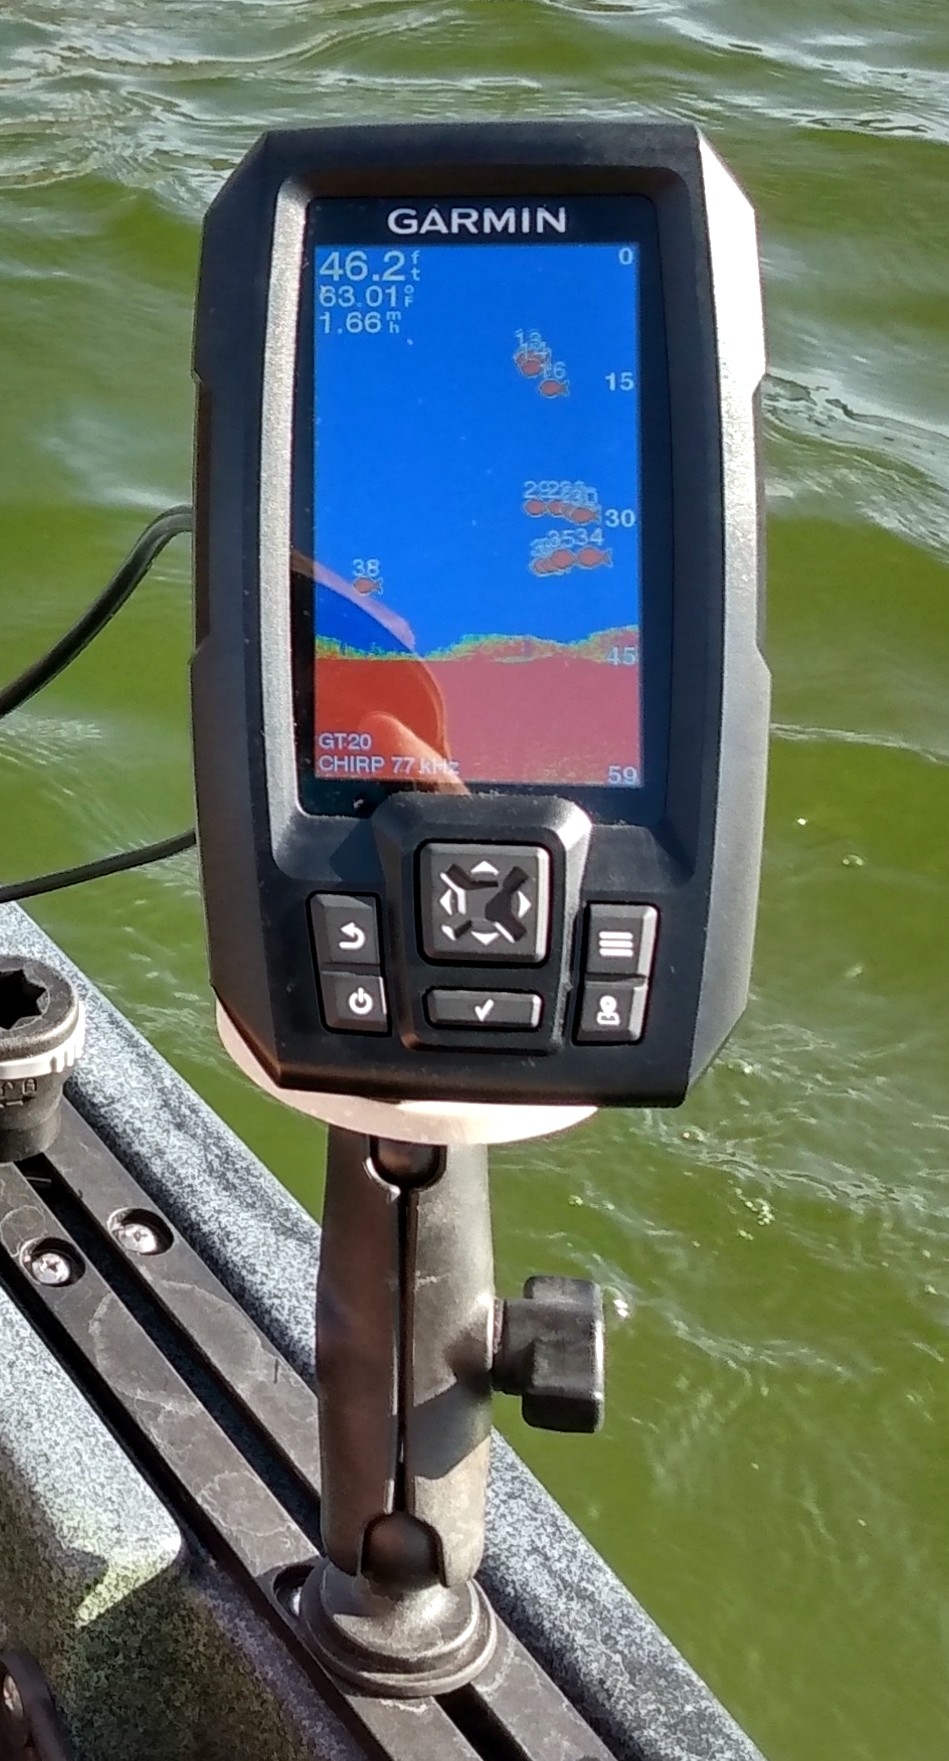
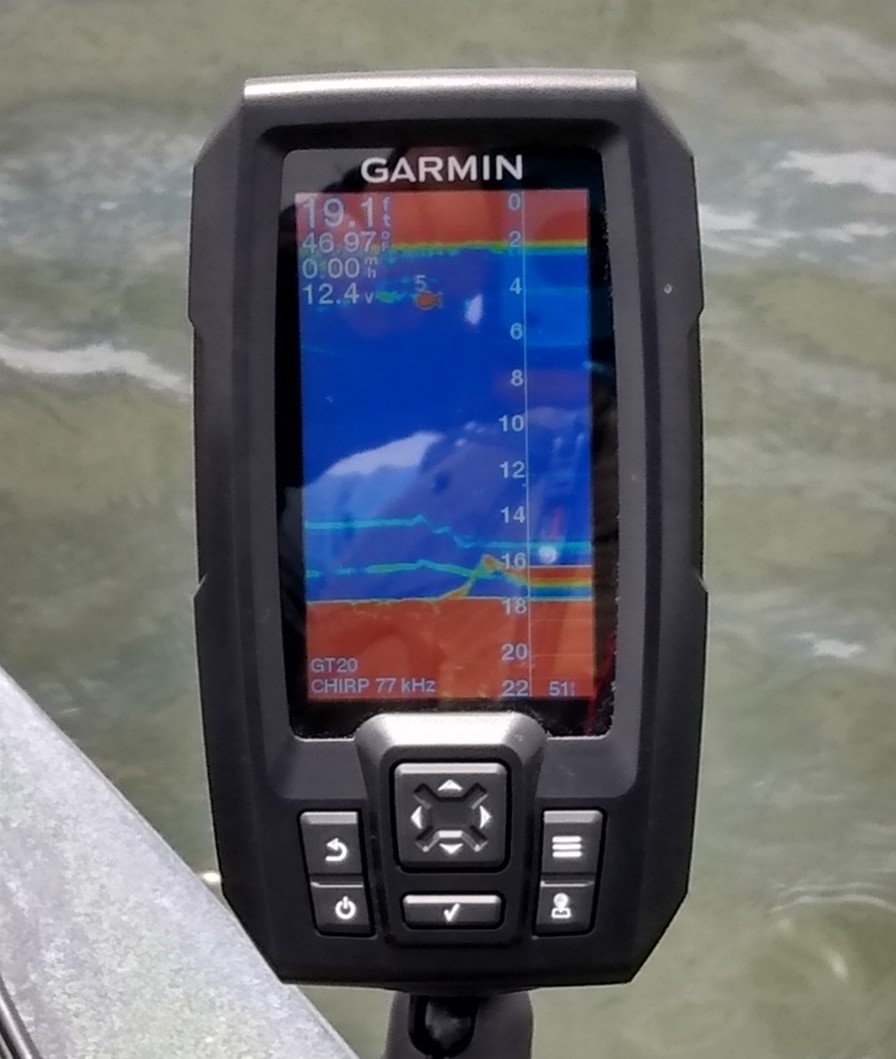
The first time that I had the fish finder operable was on a geocaching trip
(sorry) to Apache Lake. Almost as soon as I got on the water, the finder was
showing fish below me! That’s what you are seeing on the display above. It’s
showing the depth of the bottom at 46 feet, water temperature of 63°, and boat
speed of 1.66 mph. Each fish symbol is tagged with its depth.
Fishing Big Lake
But in 2011, so much of the area was consumed by the Wallow Fire, which was
huge. This included my old favorite turkey hunting area. I had only been
back there once since the big fire.
Now that it’s been 10 years, I wanted to go back again to see for myself how
recovery was coming along. But it was the chance to get out on Big Lake with
the Topwater that was the real reason that I applied for this turkey hunt.
Happily, I found a new place to camp in an area that was lightly touched by
the fire. I did visit my old camping area and was saddened to see the
devastation. It will take a lifetime, I think, for the area to even begin
to approach its pre-fire state.
After my first early morning trying to find the birds on Friday, opening day,
the weather report said that some strong evil winds were coming on Sunday,
and that Monday was going to be cold with the possibility of rain or even
snow. That left a window of decent weather on Saturday. I decided to skip
turkey hunting on Saturday, and instead go fishing before the weather kept me
holed up in camp for a while.
When I got out on the water at Big Lake, I turned on the fish finder and
found that it has almost a constant depth of around twenty feet once you get
away from the shore. I did not venture toward the dam end, which should be a
bit deeper than the rest of the lake. In wetter times, the lake may be a few
feet deeper than I found, as the concrete aprons of the boat ramps were a few
feet short of the water.
I started by rigging up a pole for trolling. I tied-on a 3” long Dodger,
then about a 3 foot long leader terminating in a rainbow colored Rapala. I
didn’t see as many fish on the sonar here, as I saw at Apache. Most of the
fish that I saw seemed pretty deep. Without a downrigger, or at least
lead-core line, I don’t think that my trolling rig was getting down deep
enough.
Next, I tried anchoring to fish bait vertically. I rigged up my second pole
for bait fishing. Since the fish finder casts a beam in the shape of a cone
directly below the boat, I was able to see my sinker and bait go down on the
fish finder! Too cool. I could actually watch it rise up and down as I
lifted my rod tip and lowered it again.
My anchor line was not quite long enough to hit the bottom at 20 feet. I had
to get closer to shore, where I could anchor in 15 to 18 feet of depth.
I had two different flavors of Powerbait. Watching the display, I hung the
bait about two feet off the bottom. Several times, I could see a fish come
up to check out the bait, then turn around and leave after saying, “Naahh.”
I might have had a nibble or two, but no hookups.
After a while, I decided that I needed live worms. I pedaled across the lake
to the docks in front of the lake store and purchased a carton of worms. Then
I headed back across the lake to the less windy side.
Again, I anchored in about 18 feet of water and with my pole resting in a rod
holder, hung the bait straight down a foot or two above the bottom. At first,
I had a couple of no-hook-up strikes, but then, fish on! Awesome!
First, some orientation. Toward the right side of the screen, you see a
vertical line with depth numbering. The bottom appears to be at 18 feet, even
though the big number at the top left shows 19 feet. I can’t explain the
discrepancy, but never-mind that.
To the right of the vertical line, this area of the display is called the
A-Scope. Again, I don’t know why it is called that, but it represents what
is happening right now in the beam of the sonar.
To the left of the vertical line is history. The display scrolls from the
vertical line leftward, at a constant speed. It doesn’t matter the speed that
the boat is moving, or if the boat is sitting still in the water. The history
continuously scrolls leftward from the vertical line. The oldest history is
on the left side of the display.
On the left side of the display, you see two blue lines at about 14 feet and
at about 16 feet. The 14 foot trace is my sinker, and the 16 foot trace is
the worm on the hook. About in the middle of the displayed history, you see
that I wiggled my bait rig, lowering it slightly in the water. Almost
immediately after the wiggle, you see a red blob rise from the bottom and
merge with the worm! That is a fish gulping the bait! The red color indicates
a stronger return signal than the signal caused by the weight and the worm.
Watching this in real time is pretty exciting. Looking up, I see the tip of
my pole start to dance.
After a short battle, I brought him up to the boat and netted him. In short
succession, I caught two more, then decided that I was done. They were each
about 12˝” long and chunky. As of January 1st, the general trout limit is now
4, instead of 6. I’m sure that I could have caught one more if I tried, but I
was camping alone, and each fish is a meal. There were only so many fish that
I could eat.
The turkeys just wouldn’t cooperate with me through the next week. As the end
of the week approached having had zero luck with the birds, it was getting time
that I started to think about heading home. Over the week, I had eaten those
three trout that I caught early in my trip. Before leaving this wonderful high
country, I wanted one more chance at trout on Big Lake, to bring some home for
my family.
I again tried the same thing that worked for me last time, anchoring and holding
a worm just off the bottom, but now it didn’t seem to be working.
I noticed a couple of differences though. The water was about 6° warmer, about
52°, instead of around 46°. Also, I saw more fish at medium depth, rather than
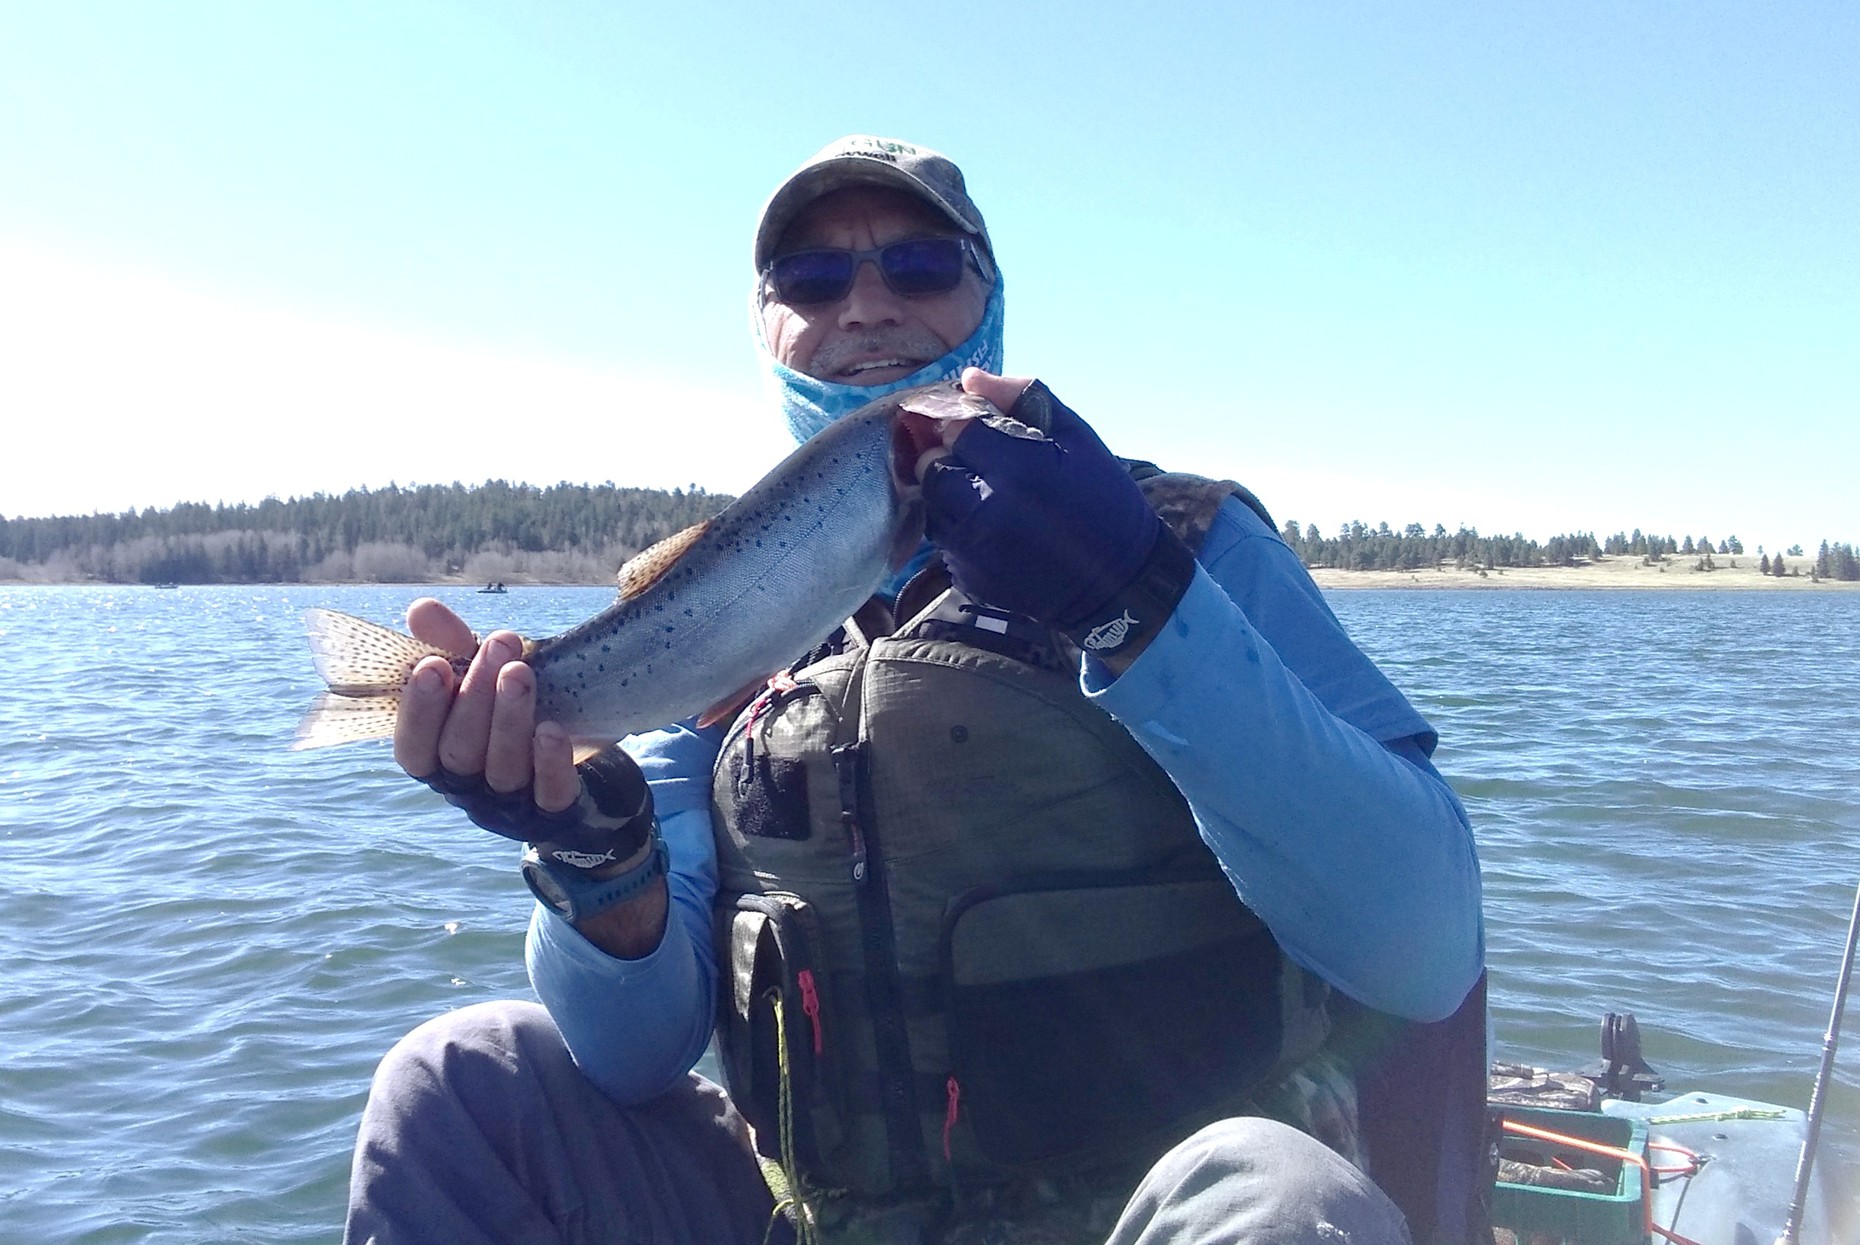
holding to the bottom. I caught my first fish of the day from about the 10 foot
depth. I caught my second fish almost immediately after catching the first, at
about the same depth. Fish #2 turned out to be the biggest trout that I had ever
caught! It was a 16” Cutthroat! Wow! I caught two more average ones around 12”
by 9:00 am and then got off the water.
Wrapping Up
I got really lucky when I placed my order with Sportsman’s Warehouse for this
boat. I watched their website for a couple months before I saw that it was
available, and after I pounced and placed my order, availability disappeared and
still has not come back.
You know who else got lucky? My son Sam found the Sportsman version of this boat
in the “Ember” color and was able to purchase his off the floor at a Bass Pro in
North Carolina. I look forward to the day when Sam and I can go adventuring
together in our Old Town 120 PDLs.
© Honeywell Sportsman Club. All rights reserved.
| ||||||||||||||||||||||||