This was another fun leather project. Many years ago (20? 25?), I purchased an
Estwing “Rigger’s Axe” for use as a camp axe. It spends 95% of its life in one
of my camp boxes, next to the propane bottles, the Coleman lantern, and the
single-burner catalytic heater. The other 5% of the time it sits on the ground
next to the fire pit at camp.
I must admit that I have not taken good care of it over the years. Every 5 years
or so, I’ll give it a fresh edge. It’s life history has basically been one of
neglect. Happily, that’s one of the greatest strengths of an Estwing. Because
the head and handle are forged from a single piece of steel, there’s not much that
you can do to kill an Estwing axe.
I got to thinking about my poor axe a couple of weeks ago, so I pulled it out of
the camping box. I frowned when I saw the orange-brown layer of rust that
covered the exposed metal. Feeling guilty for the neglect, I reached for my
drill and a flapper type sanding wheel and went to work. That did the trick.
It was all bright and shiny now. Then I took it to my benchtop belt sander and
gave it a fresh sharpening. My axe and I both felt a lot better now.
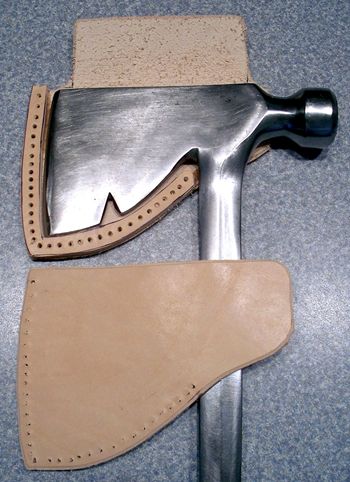
That’s when I decided that I needed to make a leather cover for it. It has never
had a cover all these years. I laid the axe down on a piece of paper and started
thinking about how a cover for it could work. I ended up with the design you see
here. It is made out of three pieces of thick leather – the type you might use
for a handgun holster. The back piece has a flap that folds over and snaps to the
front piece. The middle layer is what is called a “welt”. It prevents the sharp
edge of the blade from contacting the stitching and provides a pocket for the
thickness of the axe blade.
After the three pieces were cut out from patterns drawn onto the paper, I started
by punching the series of stitching holes in the welt. Using super glue, I
attached the welt to the rear piece. Now I used the holes in the welt as a guide
to drill matching holes in the rear piece. Next I drilled from the rear to the
front to create matching stitch holes in the front piece. I started by drilling
three holes in the front piece at the two ends and one at the bottom corner. I
temporarily fixed the front cover at these points by tying them with thread while
I finished drilling all the holes.
|
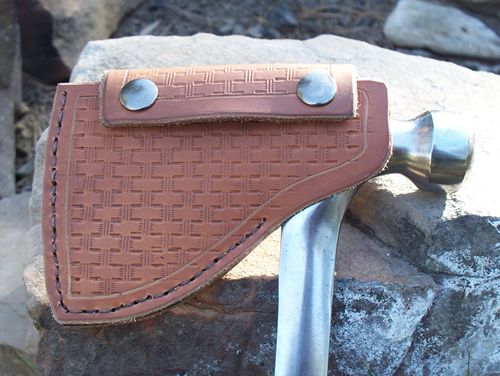
Since I wanted to advance my leather crafting skills to the next step, I decided
to try my hand at creating a basket weave pattern to add interest. I started with
the stitching groover tool to create a border for the basket weave pattern. The
basket weave tool is a simple stamp that you tap with a mallet onto the moistened
leather – over and over and over again! If you look closely at the picture, you
will see some overruns where I stamped past the border. Oh, well, I’m still
learning.
Then I did the stitching to put it all together. By the way, Tandy Leather has a
very good series of videos on YouTube to teach many of the techniques you need to
do this stuff. The lessons were invaluable to me.
I found that due to the thickness of the leather, the flap was very difficult to
fold over. I ended up fixing this problem by thinning the backside of the flap on
my belt sander. While I was at it, I used the belt sander to even up the edges
where the three pieces of leather come together.
Then it was just a matter of fixing the snaps into place, then rubbing in several
applications of neatsfoot oil to give the cover a nice mellow brown color.
Leathercraft can be a very useful tool in your outdoorsman’s skill set. Start
simple and go from there.